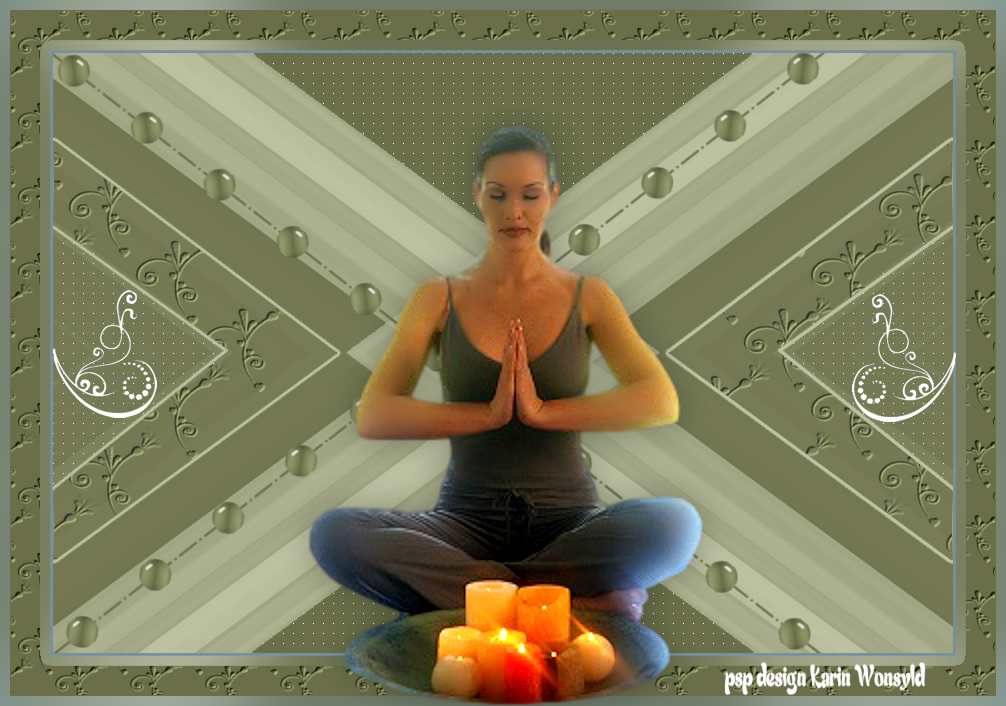
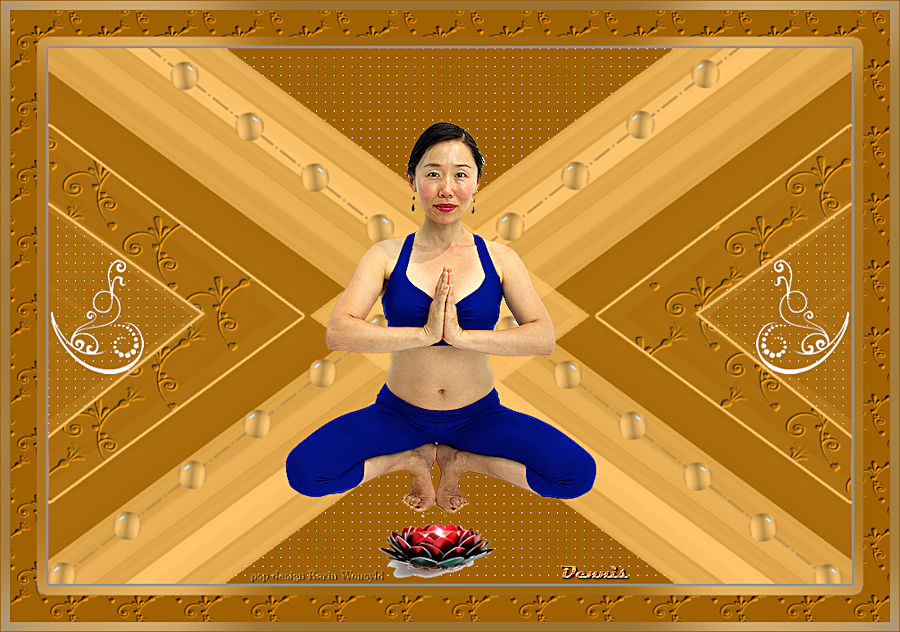
Yoga Lady
|
here you will find the original tutorials from Karin
|

|
|
You get the materials here
|
| ||
Thank you, Karin for allowing me to translate your tutorials into English
You get a Texture tuile doodle
Put it in your PSP Textures Folder
You get an Alpha Channel Yoga Lady
Open it in PSP / Window duplicate we will work on the Copy
if something goes wrong you still have the original.
I used these Colors
Color
Color 1 #bec3a3
Color 2 #9ea575
Color 3 #6a6f49
Color 4 #7591a1

Let us begin
1.
Open the Alpha Channel yoga lady
Window / Duplicate
We will work on the copy if something goes wrong
we still have the original.
2.
Flood Fill with Color 3 #6a6f49
Layers New Raster Layer
Flood Fill with Color 1 #bec3a3
And
Open the mask Narah_Mask_1441
And
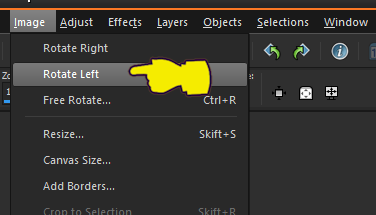
The mask must Rotate Left
1.
Open the Alpha Channel yoga lady
Window / Duplicate
We will work on the copy if something goes wrong
we still have the original.
2.
Flood Fill with Color 3 #6a6f49
Layers New Raster Layer
Flood Fill with Color 1 #bec3a3
And
Open the mask Narah_Mask_1441
And
The mask must Rotate Left
Go back to the Working Image
Layers / New Mask Layer from Image (with the following settings)
Layers / New Mask Layer from Image (with the following settings)
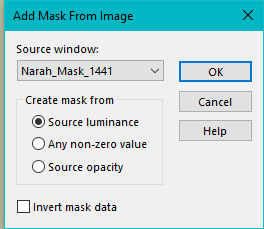
Layers / Merge / Merge Group
Layers / Duplicate
Image / Mirror Horizontal (Mirror in previous versions)
3.
Activate the bottom Raster Layer
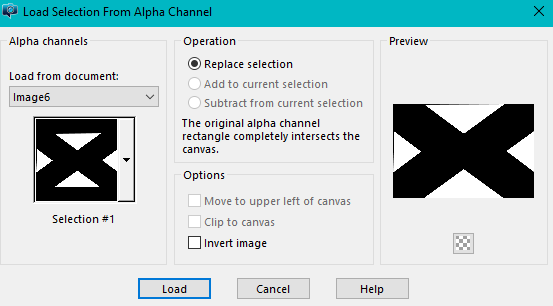
Selections / Load/Save Selection Load Selection from Alpha Channel
Select No. 1 (with the following settings)
Layers / Duplicate
Image / Mirror Horizontal (Mirror in previous versions)
3.
Activate the bottom Raster Layer
Selections / Load/Save Selection Load Selection from Alpha Channel
Select No. 1 (with the following settings)
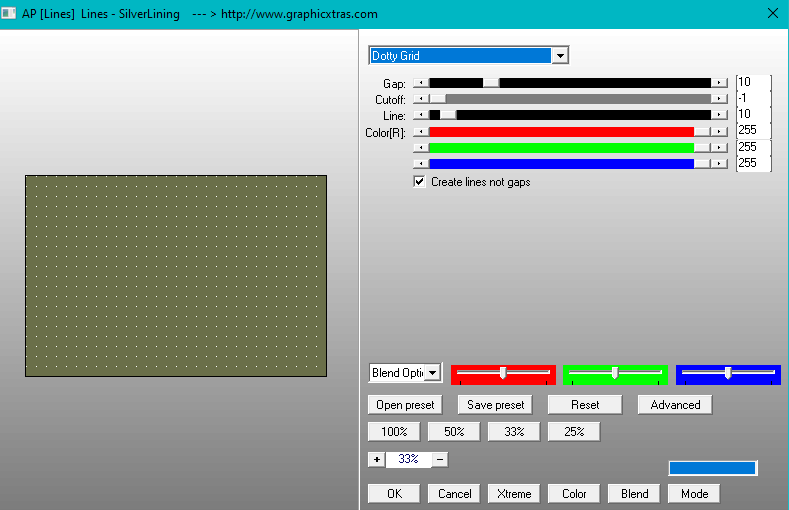
Plugins / AP [Lines] Lines SilverLining (with the following settings)
Selections / Select None
4.
Stay on the Bottom Layer
Selections / Load/Save Selection / Load Selection from Alpha Channel
Select No. 2
Same settings as Step 2
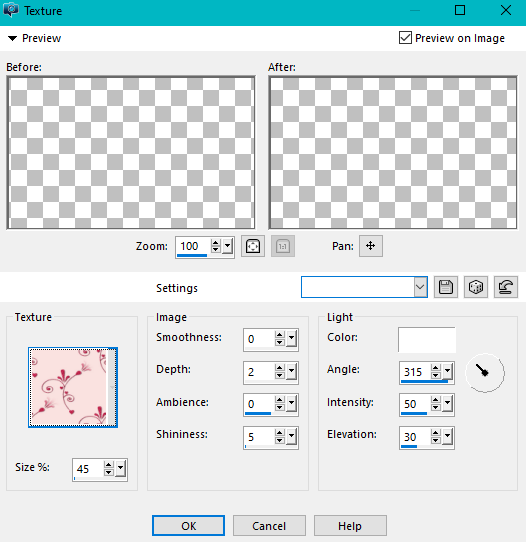
Effects / Texture Effects / Texture (with the following settings)
You will need tuile doodle (with the following settings)
4.
Stay on the Bottom Layer
Selections / Load/Save Selection / Load Selection from Alpha Channel
Select No. 2
Same settings as Step 2
Effects / Texture Effects / Texture (with the following settings)
You will need tuile doodle (with the following settings)
Selections / Modify / Select Selection Borders (with the following settings)
Layers New Raster Layer
Flood Fill with Color 1
Selections / Select None
5.
Activate the Top Raster Layer
Open the tube kw deco yoga lady.png
Edit / Copy
Edit / Paste as a New Layer
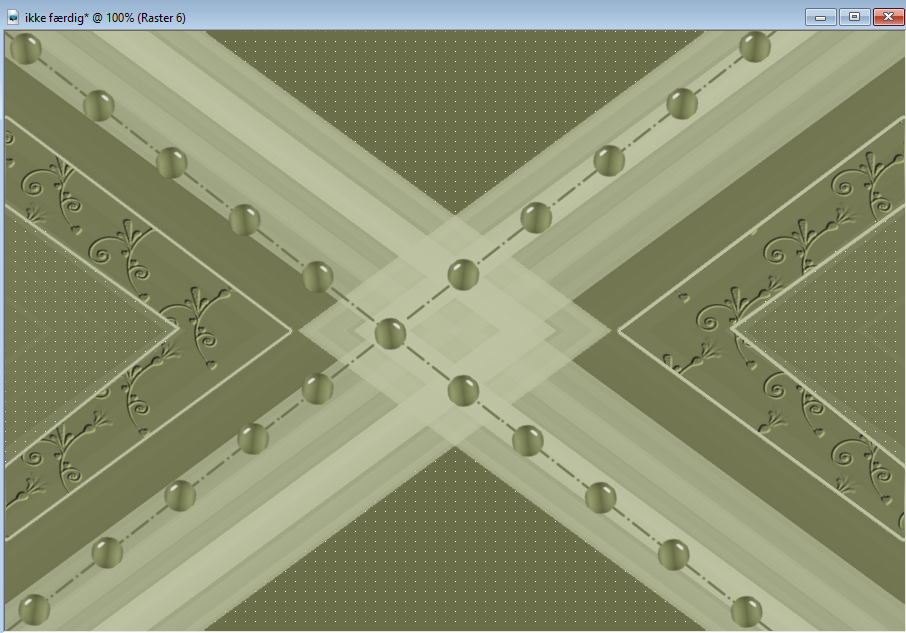
Place as on the Example
Layers New Raster Layer
Flood Fill with Color 1
Selections / Select None
5.
Activate the Top Raster Layer
Open the tube kw deco yoga lady.png
Edit / Copy
Edit / Paste as a New Layer
Place as on the Example
5.
Image Add Borders 3-pixels in Color 4 #9ea575
Edit / Copy
It will be in memory until you need it
Image Add Borders 50-pixels in a Neutral Color
Activate the Magic Wand and Select the 50-pixel Border
Edit Paste into Selection
Adjust / Blur / Gaussian Blur 30
Selections / Modify Contract by 10
Layers / New Raster Layer
Flood Fill with Color 3 #6a6f49
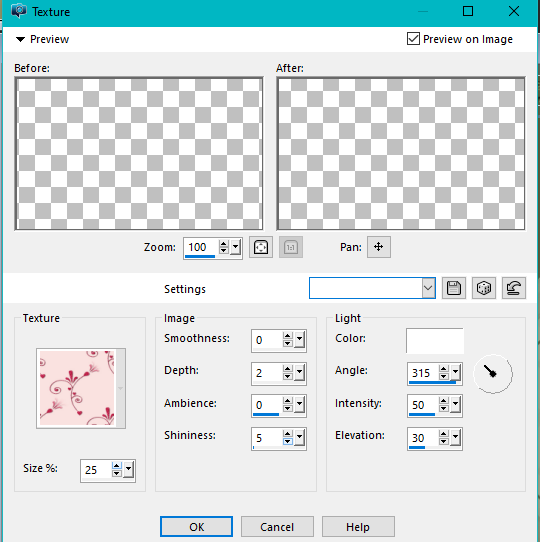
Effects / Texture Effects / Texture (with the following settings)
You will need tuile doodle
Image Add Borders 3-pixels in Color 4 #9ea575
Edit / Copy
It will be in memory until you need it
Image Add Borders 50-pixels in a Neutral Color
Activate the Magic Wand and Select the 50-pixel Border
Edit Paste into Selection
Adjust / Blur / Gaussian Blur 30
Selections / Modify Contract by 10
Layers / New Raster Layer
Flood Fill with Color 3 #6a6f49
Effects / Texture Effects / Texture (with the following settings)
You will need tuile doodle
Selections / Select None
7.
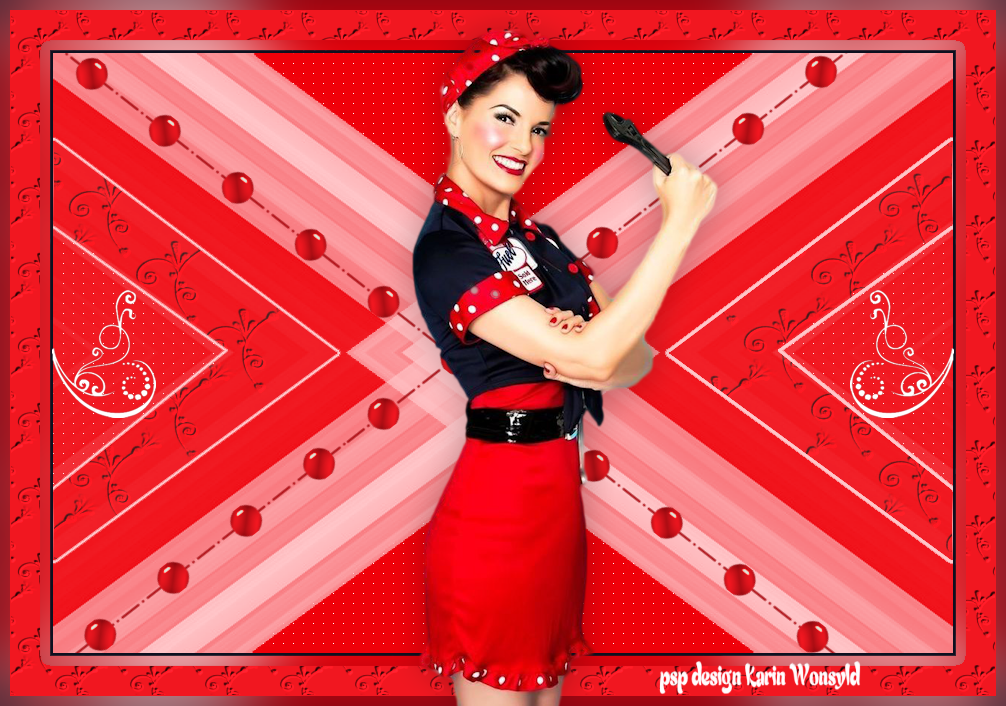
Open the tube woman_724_franiemargot
Edit / Copy
Edit / Paste as New Layer
Place her as in the Example
8.
Open the tube kw vintage
Edit Copy
Edit Paste as New Layer
Place as in the Example
Duplicate Layers
Image Mirror
Add your name or watermark
Save as jp
Hugs Dennis
7.
Open the tube woman_724_franiemargot
Edit / Copy
Edit / Paste as New Layer
Place her as in the Example
8.
Open the tube kw vintage
Edit Copy
Edit Paste as New Layer
Place as in the Example
Duplicate Layers
Image Mirror
Add your name or watermark
Save as jp
Hugs Dennis
|
Dennis b tags
|
Karin B tags
|
