tutorials Dennis
|
here you will find the original tutorials from Karin
|

|
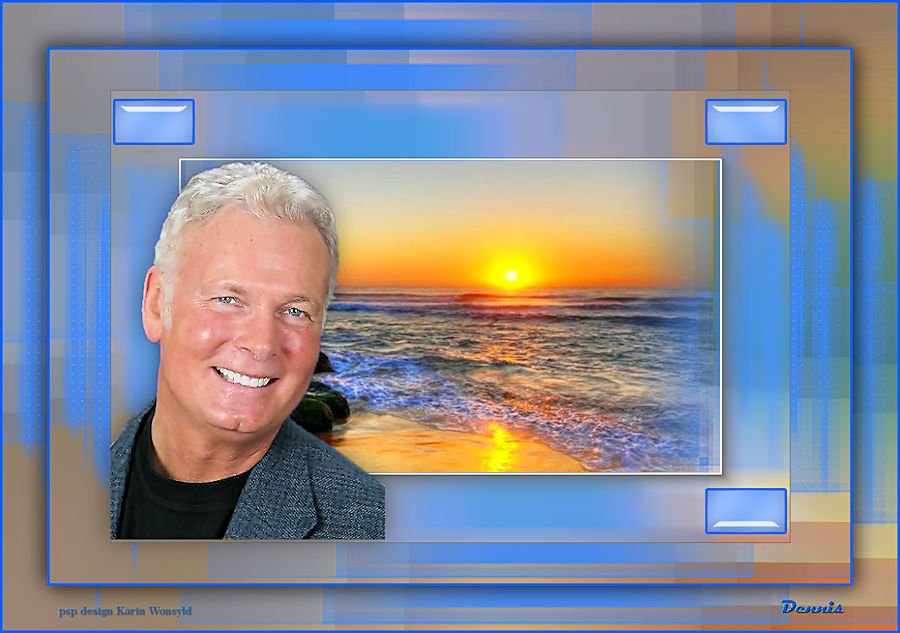
This Tutorials is dedicated to Dennis
for translating my tutorials into English
Many thanks to Dennis
for translating my tutorials into English
Many thanks to Dennis
|
You get the materials here
|
| ||
You get 2 Selections / Place them in the PSP File / Selections Folder
Thank you to Grisi because I can use the tubes in my Tutorials,
Tubes from Grisi that are in this Tutorial
must not be posted on other websites, blogs or Forums
or shared without her permission.
The following Plugins were used in the Tutorial
Mehdi / Sorting Tiles
Filters Unlimited 2.0 / Toadies
AP (Lines) Lines / Silverlining
AAA Frames / Foto Frame
Alien Skin / Eye Candy 5 Impact / Glass
Alien Skin / Eye Candy 5 Impact / Perspective Shadow
I used the following Colors
Color
1 #d3b59b
2 #8d6e52
3 #77683b
4 #613932

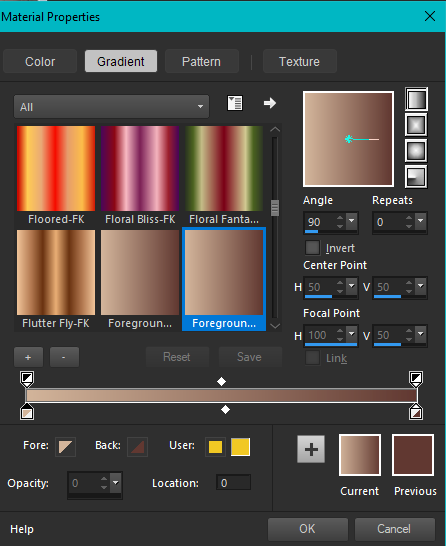
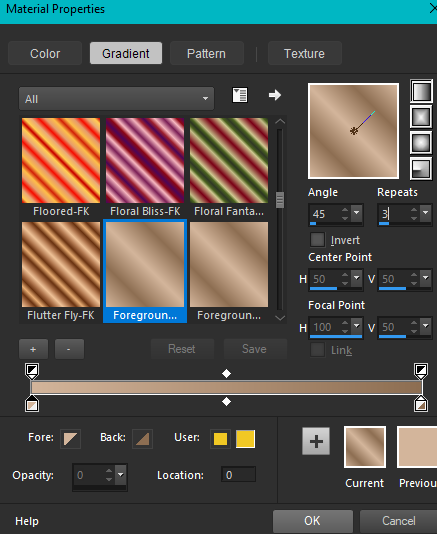
Make a Linear Gradient with Colors 1 and 4
(with the following settings)
(with the following settings)
Let us begin
1.
Open a New Image 900 x 600
Flood Fill with the Gradient
Selections / Select All
Open the tube Grisi_Misted_Paisaje_344
Edit / Copy
Edit / Paste into Selection
Selections / Select None
2.
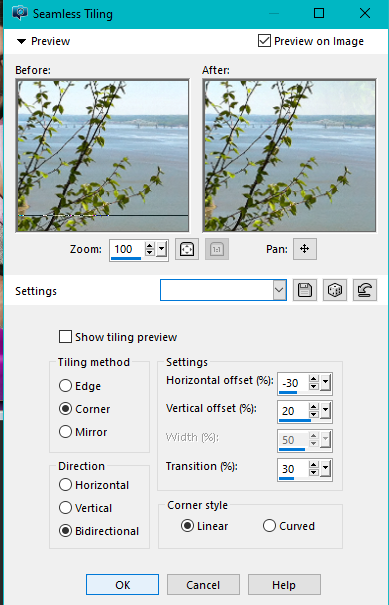
Effects / Image Effects / Seamless Tiling (with the following settings)
1.
Open a New Image 900 x 600
Flood Fill with the Gradient
Selections / Select All
Open the tube Grisi_Misted_Paisaje_344
Edit / Copy
Edit / Paste into Selection
Selections / Select None
2.
Effects / Image Effects / Seamless Tiling (with the following settings)
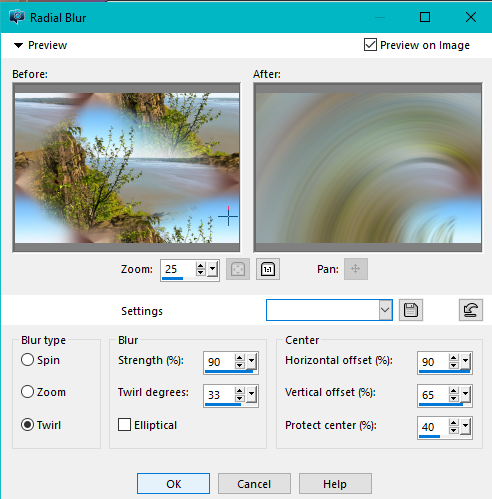
Adjust / Blur / Radial Blur (with the following settings)
Effects / Edge Effects / Enhance More
3.
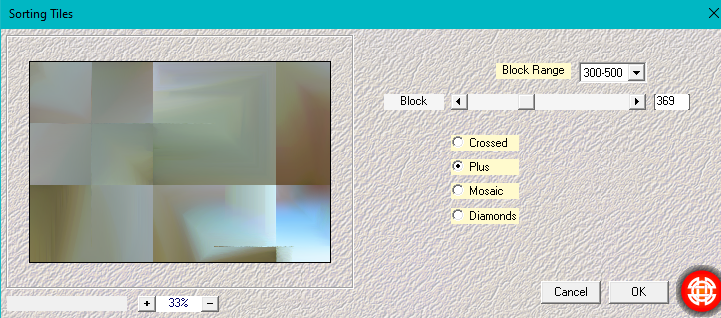
Plugins / Mehdi / Sorting Tiles (with the following settings)
3.
Plugins / Mehdi / Sorting Tiles (with the following settings)
Plugins / Filters Unlimited 2.0 / Toadies / What Are You? / 20/20
5.
Layers / New Raster Layer
Flood Fill with Color 3
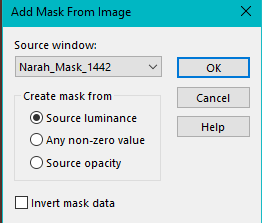
Open the Mask Narah_Mask_1442
Layers / New Mask from Image (with the following settings)
5.
Layers / New Raster Layer
Flood Fill with Color 3
Open the Mask Narah_Mask_1442
Layers / New Mask from Image (with the following settings)
Layers Merge Group
6.
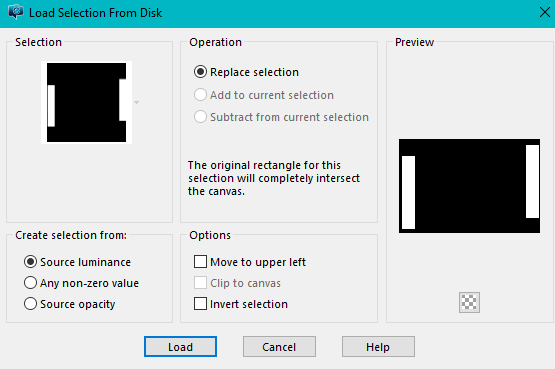
Selections / Load/Save Selection / Load Selection from Disk
Locate kw dennis (with the following settings)
6.
Selections / Load/Save Selection / Load Selection from Disk
Locate kw dennis (with the following settings)
Selections / Promote Selection to Layer
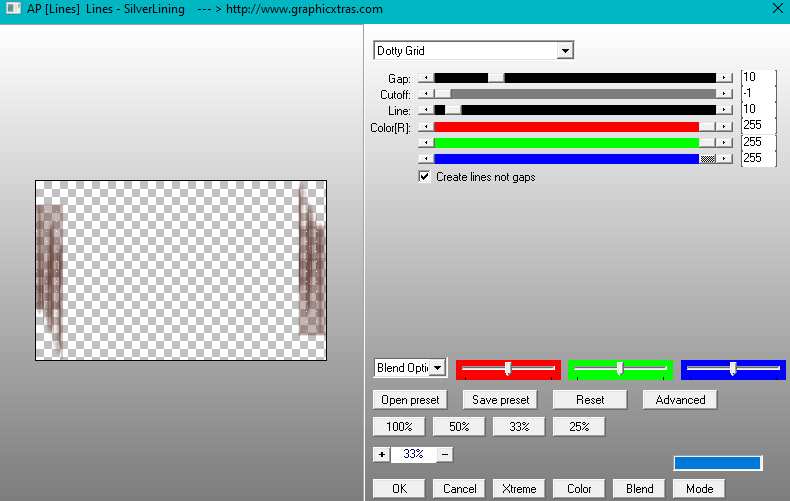
Plugins / AP [Lines] Lines / Silverlining
(with the following settings)
Plugins / AP [Lines] Lines / Silverlining
(with the following settings)
Selections / Select None
Layers / Properties / Opacity 50
Layers / Merge / Merge Visible
Layers / Duplicate
7.
Plugins / AAA Frames / Foto Frame (with the following settings)
Layers / Properties / Opacity 50
Layers / Merge / Merge Visible
Layers / Duplicate
7.
Plugins / AAA Frames / Foto Frame (with the following settings)
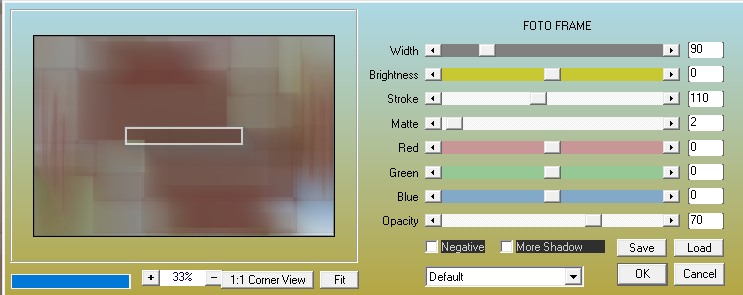
Image Resize 85% (no check mark in resize all layers)
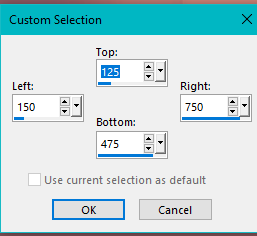
Activate the Selections Tool / Custom Selection
(with the following settings)
Activate the Selections Tool / Custom Selection
(with the following settings)

8.
Open the tube Grisi_Misted_Paisaje_344.pspimage
Edit / Copy
Edit / Paste as New Layer
Image Resize 85% (place as in the Example below)
Open the tube Grisi_Misted_Paisaje_344.pspimage
Edit / Copy
Edit / Paste as New Layer
Image Resize 85% (place as in the Example below)
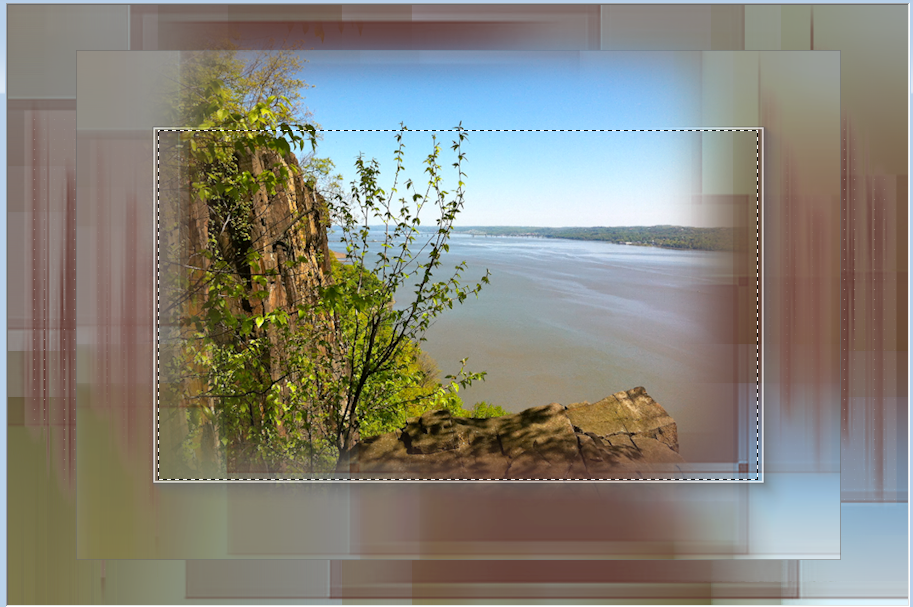
Selections / Invert
Press Delete on the Keyboard
Selections / Select None
9.
Set the Foreground Color to Color 2 / Background to Color 1
Create a Linear Gradient (with the following settings)
Press Delete on the Keyboard
Selections / Select None
9.
Set the Foreground Color to Color 2 / Background to Color 1
Create a Linear Gradient (with the following settings)
Layers / New Raster Layer
Selections / Load/Save Selection / Load Selection from Disk
Locate/ kw dennis 2
Same settings as Step 6
Flood Fill with the Gradient
Adjust / Blur / Gaussian Blur 10
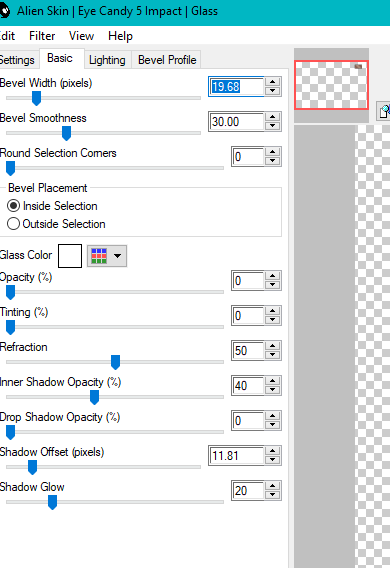
Effects / Plugins / Alien Skin / Eye Candy 5 Impact / Glass
(with the following settings)
Selections / Load/Save Selection / Load Selection from Disk
Locate/ kw dennis 2
Same settings as Step 6
Flood Fill with the Gradient
Adjust / Blur / Gaussian Blur 10
Effects / Plugins / Alien Skin / Eye Candy 5 Impact / Glass
(with the following settings)
Keep Selected
Layers / New Raster Layer
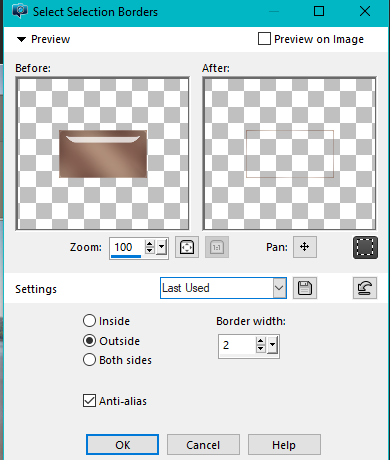
Selections / Modify / Select Selections Borders
(with the following settings)
Layers / New Raster Layer
Selections / Modify / Select Selections Borders
(with the following settings)
Flood Fill with Color 4
Selections / Select None
Layers / Merge Down
Layers Duplicate 2x
Place as in the Example
10.
Activate the Bottom Raster Layers
Edit / Copy
It stays in Memory
Image / Add Borders 3-pixels Color 4
Layers / Promote Background Layer
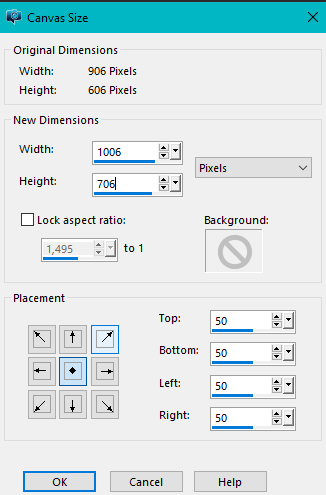
Image Canvas Size (with the following settings)
Selections / Select None
Layers / Merge Down
Layers Duplicate 2x
Place as in the Example
10.
Activate the Bottom Raster Layers
Edit / Copy
It stays in Memory
Image / Add Borders 3-pixels Color 4
Layers / Promote Background Layer
Image Canvas Size (with the following settings)
Layers / New Raster Layer
Layers / Arrange Send to Bottom
Activate the lower Raster Layer
Selections / Select All
Edit / Paste into Selection
Selections / Select None
Activate the Top Raster Layer
Effects / 3d Effects / Drop Shadow 5 / 6 / 50 / 30 Black
Repeat the Drop Shadow this time (with the following settings)
/ -5 / -6 / 50 / 30 Black
11.
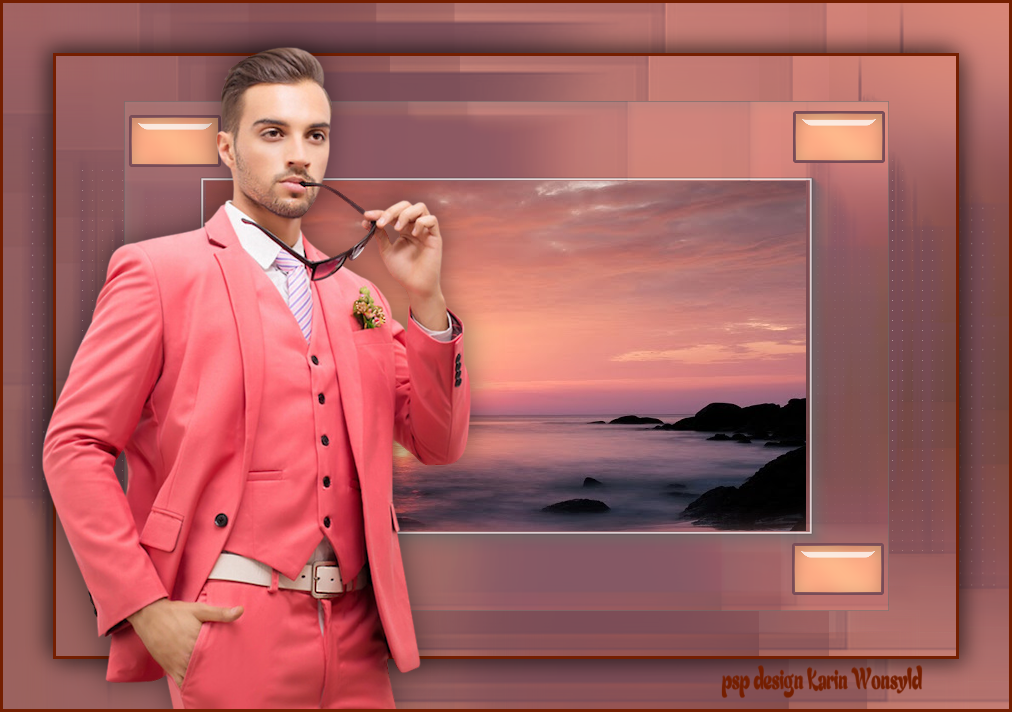
Open the tube Grisi_Tube_Man_340.pspImage
Edit / Copy
Edit / Paste as a New Layer
Image / Mirror Horizontal (Mirror in earlier versions)
Image / Resize 1 x 85%
Place as in the Example
Effects / Plugins / Alien Skin / Eye Candy 5 Impact / Perspective Shadow (with the following settings)
Layers / Arrange Send to Bottom
Activate the lower Raster Layer
Selections / Select All
Edit / Paste into Selection
Selections / Select None
Activate the Top Raster Layer
Effects / 3d Effects / Drop Shadow 5 / 6 / 50 / 30 Black
Repeat the Drop Shadow this time (with the following settings)
/ -5 / -6 / 50 / 30 Black
11.
Open the tube Grisi_Tube_Man_340.pspImage
Edit / Copy
Edit / Paste as a New Layer
Image / Mirror Horizontal (Mirror in earlier versions)
Image / Resize 1 x 85%
Place as in the Example
Effects / Plugins / Alien Skin / Eye Candy 5 Impact / Perspective Shadow (with the following settings)
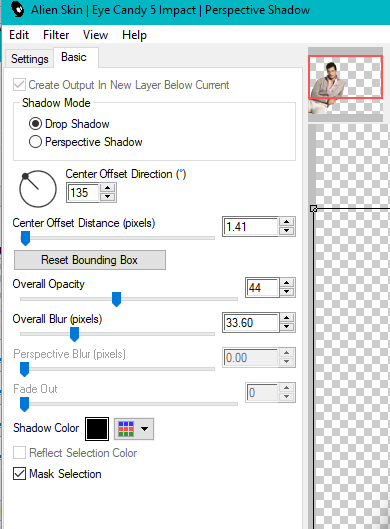
Image / Add Borders 3-pixels Color 4
Add your name or watermark
Save as jpg
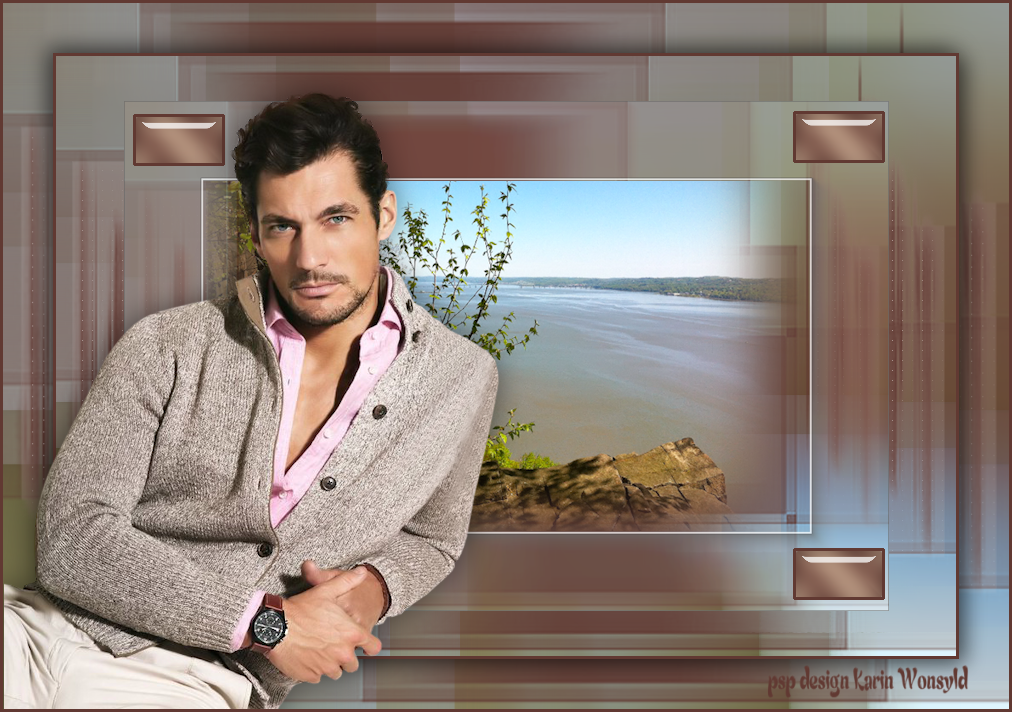
Hope you enjoyed my tut Regards Karin Here are results from others who have tried this tutorial you may also like to send the result to me then they will come here below but preferably with other tubes and Color
Add your name or watermark
Save as jpg
Hope you enjoyed my tut Regards Karin Here are results from others who have tried this tutorial you may also like to send the result to me then they will come here below but preferably with other tubes and Color
|
dennis b tag
|
karins b tags
|
