Tutorial Twins
|
here you will find the original tutorials from Karin
|

|
|
You get your materials here
|
| ||
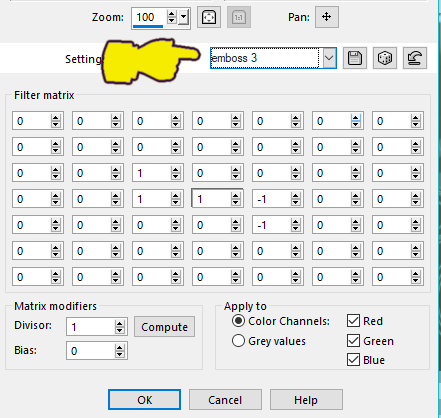
You get a Preset user defined filter emboss 3
Place it in the folder my PSP folder Presets
You get a Folder with Selections. place the Folder in the PSP Selections Folder
I used the following Colors
Color 1 #d7b1a3 /
Color 2 #88462e
/ White #ffffff
Place it in the folder my PSP folder Presets
You get a Folder with Selections. place the Folder in the PSP Selections Folder
I used the following Colors
Color 1 #d7b1a3 /
Color 2 #88462e
/ White #ffffff

Let us begin
1
Open a New Transparent Image 1000 x 700
Activate the Selection Tool / Custom Selection
(with these settings)

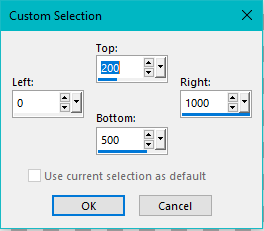
Flood Fill with Color 2 #88462e
Selections / Select None
Open the Tube / kw deco 1
Edit / Copy
Edit / Paste as a New Layer
Objects / Align / Left
Effects / User Defined Filter
(with these settings)
Selections / Select None
Open the Tube / kw deco 1
Edit / Copy
Edit / Paste as a New Layer
Objects / Align / Left
Effects / User Defined Filter
(with these settings)
Layers / Merge Down
2
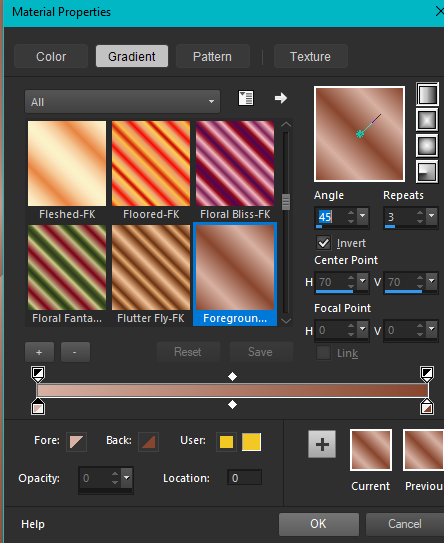
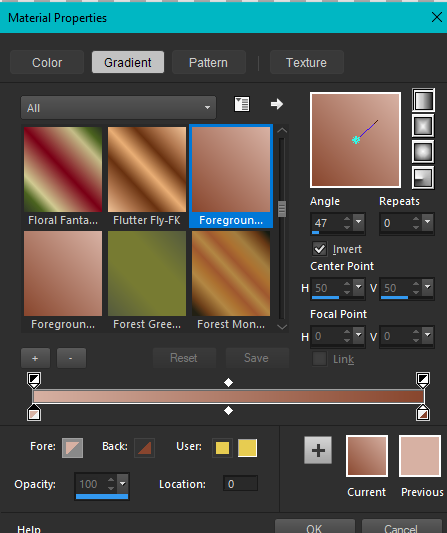
Foreground Color 1 #d7b1a3
/ Background Color 2 #88462e
Make a Linear Gradient
(with these settings)
Layers / New Raster Layer
Flood Fill with the Gradient
Layers / Duplicate
Image / Mirror Horizontal (Mirror in older versions)
Layers / Properties Opacity 50
Layers / Merge Down
Layers / New Raster Layer
Flood Fill with Color 2 #88462e
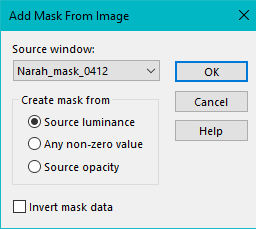
Open the Mask / Narah_mask_0412
Layers / New Mask Layer from Image
(with these settings)
Flood Fill with the Gradient
Layers / Duplicate
Image / Mirror Horizontal (Mirror in older versions)
Layers / Properties Opacity 50
Layers / Merge Down
Layers / New Raster Layer
Flood Fill with Color 2 #88462e
Open the Mask / Narah_mask_0412
Layers / New Mask Layer from Image
(with these settings)
Layers / Merge Group
Effects / Edge Effects / Enhance
3
Layers / New Raster Layer
Flood Fill with Color 1 #d7b1a3
Open the Mask / Narah_Mask_0428
Layers / New Mask Layer from Image
(same settings as step 2)
Layers / Merge Group
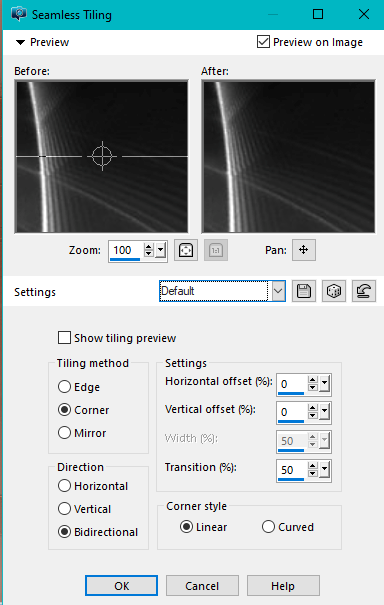
Effects / Image Effects / Seamless Tiling
(Default settings)
Effects / Edge Effects / Enhance
3
Layers / New Raster Layer
Flood Fill with Color 1 #d7b1a3
Open the Mask / Narah_Mask_0428
Layers / New Mask Layer from Image
(same settings as step 2)
Layers / Merge Group
Effects / Image Effects / Seamless Tiling
(Default settings)
Layers / Properties / Blend Mode Overlay
(if you use other Colors you may need to try another option here)
Effects / Edge Effects / Enhance
4
Close the Eye on the Bottom Raster Layer
Activate the Top Raster Layer
Layers / Merge Visible
Open the Eye on the Lower Raster Layer
5
Make sure you are on the Top Raster Layer
Activate the Selection Tool / Custom Selection
(with these settings)

Press the Delete Key on the Keyboard
Selections / Select None
Still on the Top Raster Layer
Effects / 3d Effects / Drop Shadow / 5 / 6 / 50 / 25 Black
Repeat the Drop Shadow with minus -5 / minus -6 / 50 / 25 Black
Effects / 3d Effects / Drop Shadow / -5 / -6 / 50 / 25 Black
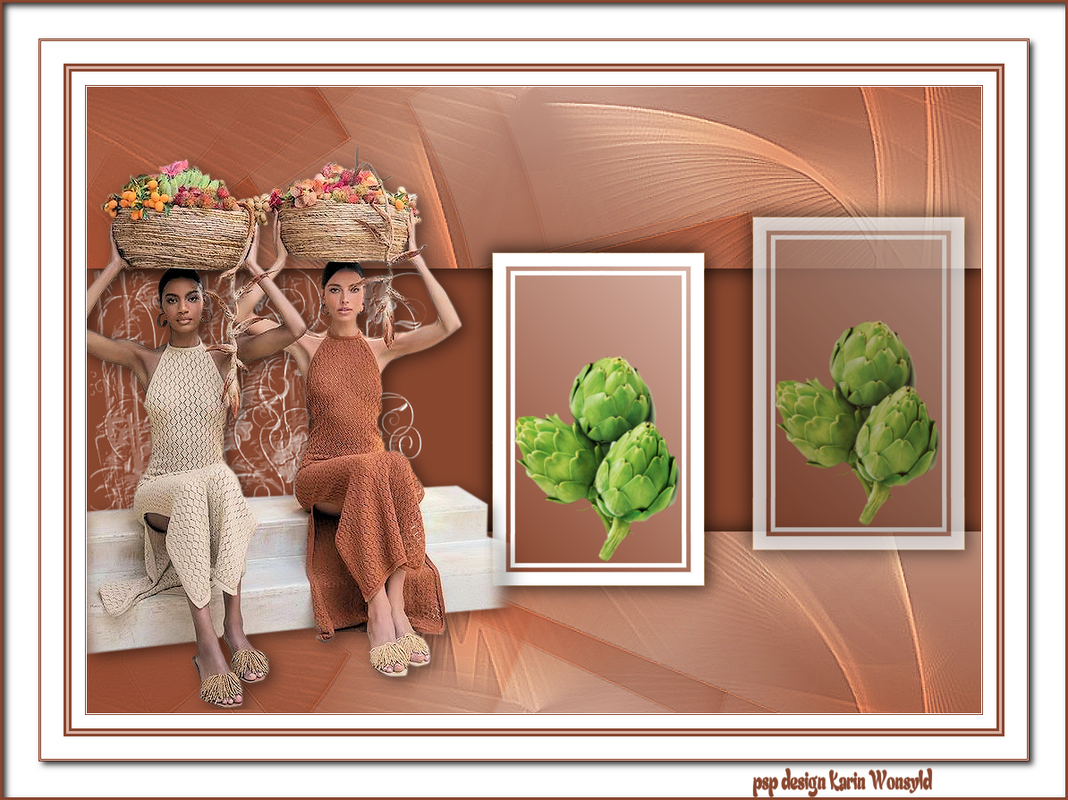
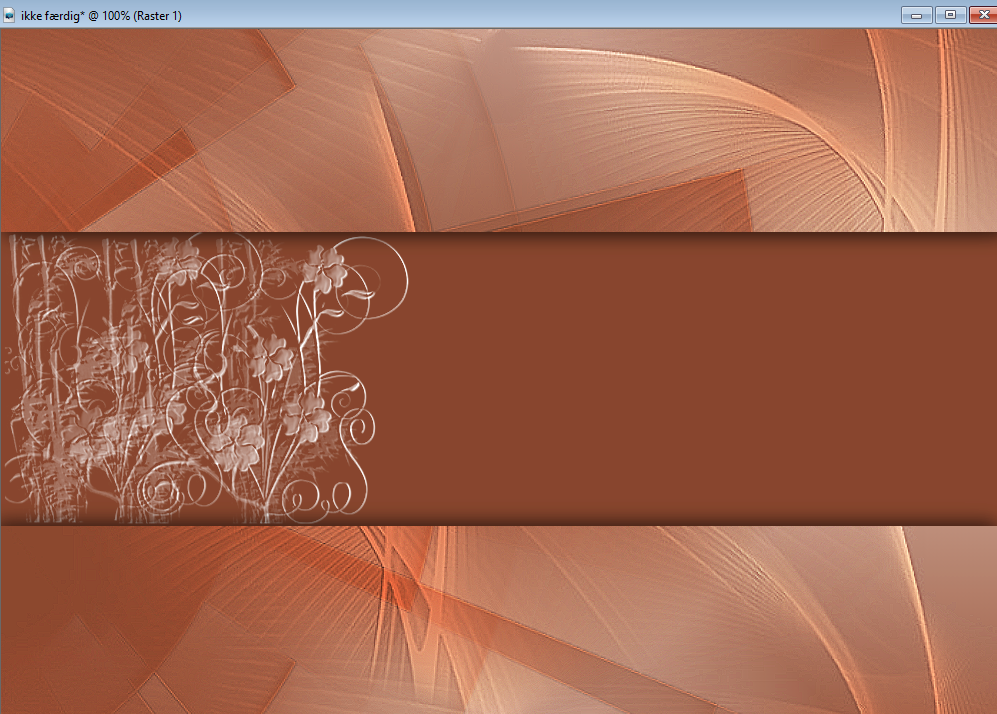
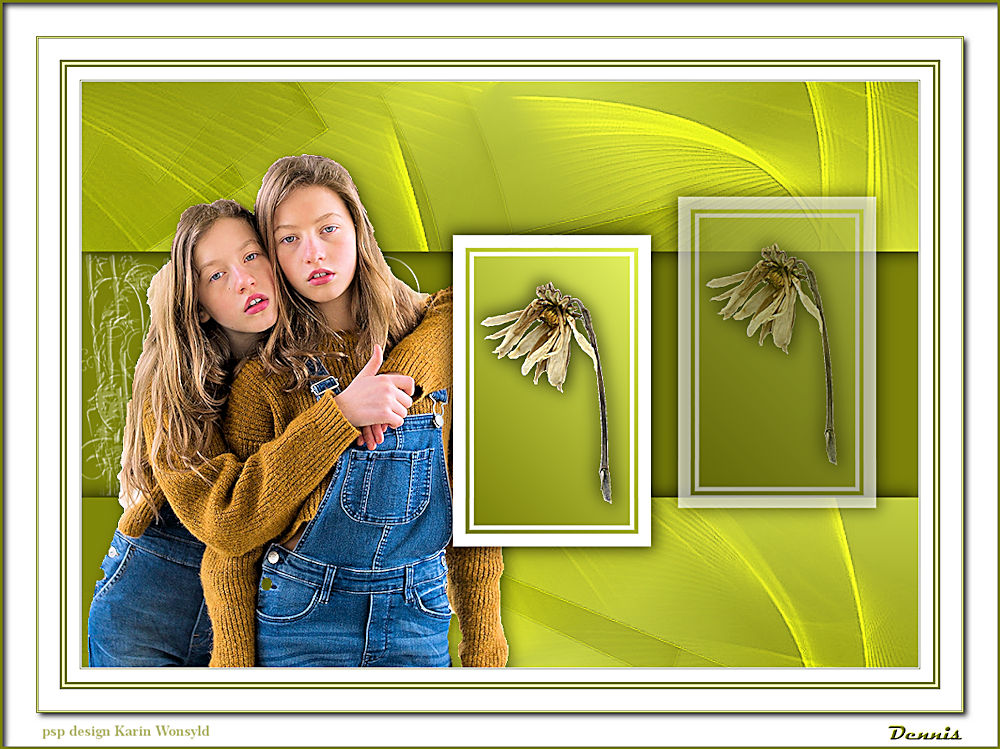
Now your Image should like this
Selections / Select None
Still on the Top Raster Layer
Effects / 3d Effects / Drop Shadow / 5 / 6 / 50 / 25 Black
Repeat the Drop Shadow with minus -5 / minus -6 / 50 / 25 Black
Effects / 3d Effects / Drop Shadow / -5 / -6 / 50 / 25 Black
Now your Image should like this
6
Layers / New Raster Layer
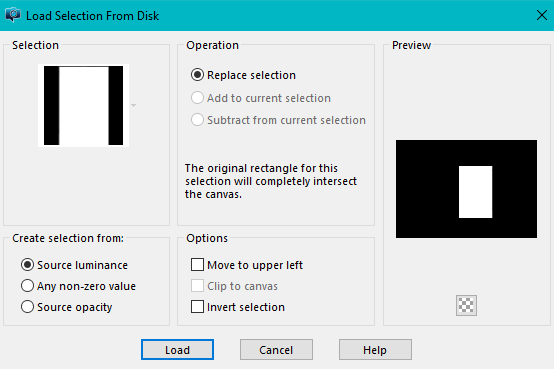
Selections / Load/Save Selection / Load Selection from Disk
Locate / kw twins 1
(with these settings)
Layers / New Raster Layer
Selections / Load/Save Selection / Load Selection from Disk
Locate / kw twins 1
(with these settings)
Flood Fill with White
Selections / Modify / Contract by 15
Keep Selected
Foreground Color 1 #d7b1a3 /
Background Color 2 #88462e
Make a Linear Gradient
(with these settings)
Selections / Modify / Contract by 15
Keep Selected
Foreground Color 1 #d7b1a3 /
Background Color 2 #88462e
Make a Linear Gradient
(with these settings)
Flood Fill with the Gradient
Selections / Modify / Contract by 5
Layers / New Raster Layer
Flood Fill with White
Selections / Modify / Contract by 5
Flood Fill with the Gradient
Layers / Merge Down
Selections / Select None
7
Open the Tube / kw food
Edit / Copy
Edit / Paste as a New Layer
Layer / Merge Down
Layers / Duplicate
Move it over to the right and up slightly
Layers / Properties / Opacity 50
Layers / Merge Down
Effects / 3d Effects / Drop Shadow / 5 / 6 / 50 / 25 Black
Repeat the Drop Shadow with minus -5 / minus -6
Effects / 3d Effects / Drop Shadow / -5 / -6 / 50 / 25 Black
8
Open the Tube / 3271 - women - LB TUBES.pspImage
on the tube as it is slightly indistinct
stand on the lady Layer
Adjust / One Step Photo Fix
Edit / Copy
Edit / Paste as a New Layer
Move it over to the Left
Effects / 3d Effects / Drop Shadow / 5 / 6 / 50 / 25 Black
9
Image / Add Borders 1-pixel in White
Image / Add Borders 1-pixel Color 2 #88462e
Image / Add Borders 15-pixels in White
Image / Add Borders 3-pixels Color 2 #88462e
Image / Add Borders 3-pixels Color 1 #d7b1a3
Image / Add Borders 3-pixels Color 2 #88462e
Image / Add Borders 25-pixels White
Image / Add Borders 1-pixel Color 2 #88462e
Image / Add Borders 1-pixel Color 1 #d7b1a3
Image / Add Borders 1-pixel Color 2 #88462e
Image / Add Borders 40-pixels in White
Image / Add Borders 3-pixels Color 2 #88462e
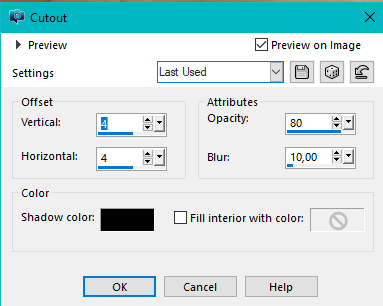
Activate the Magic Wand and Select the 40-pixel Border
Effects / 3d Effects / Cutout
(with these settings)
Selections / Modify / Contract by 5
Layers / New Raster Layer
Flood Fill with White
Selections / Modify / Contract by 5
Flood Fill with the Gradient
Layers / Merge Down
Selections / Select None
7
Open the Tube / kw food
Edit / Copy
Edit / Paste as a New Layer
Layer / Merge Down
Layers / Duplicate
Move it over to the right and up slightly
Layers / Properties / Opacity 50
Layers / Merge Down
Effects / 3d Effects / Drop Shadow / 5 / 6 / 50 / 25 Black
Repeat the Drop Shadow with minus -5 / minus -6
Effects / 3d Effects / Drop Shadow / -5 / -6 / 50 / 25 Black
8
Open the Tube / 3271 - women - LB TUBES.pspImage
on the tube as it is slightly indistinct
stand on the lady Layer
Adjust / One Step Photo Fix
Edit / Copy
Edit / Paste as a New Layer
Move it over to the Left
Effects / 3d Effects / Drop Shadow / 5 / 6 / 50 / 25 Black
9
Image / Add Borders 1-pixel in White
Image / Add Borders 1-pixel Color 2 #88462e
Image / Add Borders 15-pixels in White
Image / Add Borders 3-pixels Color 2 #88462e
Image / Add Borders 3-pixels Color 1 #d7b1a3
Image / Add Borders 3-pixels Color 2 #88462e
Image / Add Borders 25-pixels White
Image / Add Borders 1-pixel Color 2 #88462e
Image / Add Borders 1-pixel Color 1 #d7b1a3
Image / Add Borders 1-pixel Color 2 #88462e
Image / Add Borders 40-pixels in White
Image / Add Borders 3-pixels Color 2 #88462e
Activate the Magic Wand and Select the 40-pixel Border
Effects / 3d Effects / Cutout
(with these settings)
Selections / Select None
10
Add your name or watermark
Save as jpg
Hugs Dennis
10
Add your name or watermark
Save as jpg
Hugs Dennis
|
Dennis b tags
|
