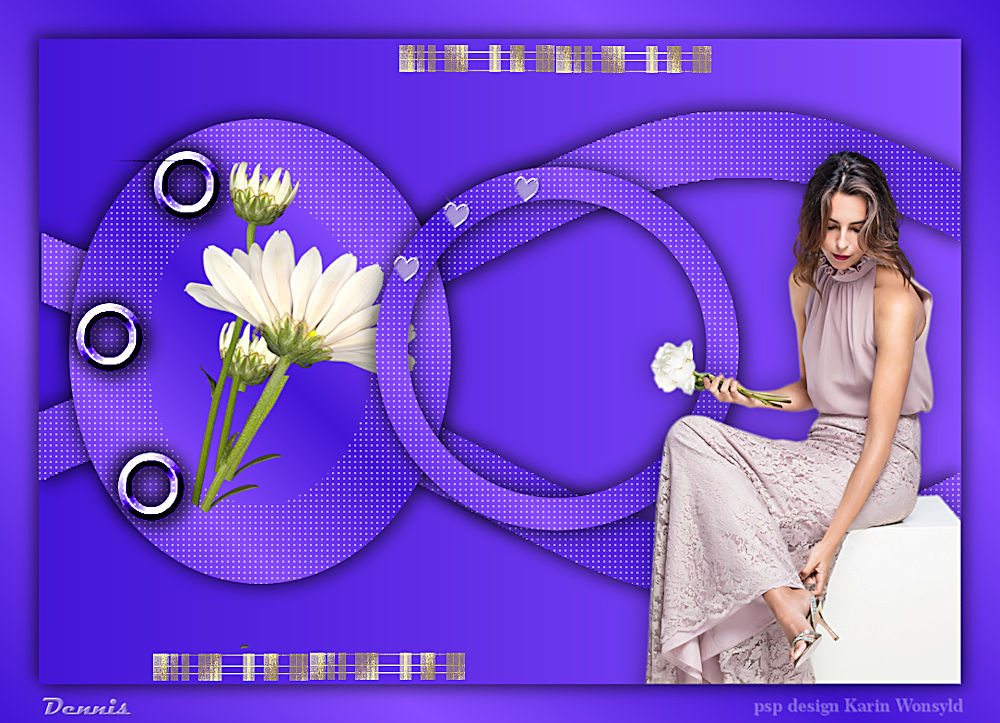
Tutorial 2 Circles

|
here you will find the original tutorials from Karin
|

|
Thanks to Gyűrüsné Molnár Julianna for letting me use her tag as inspiration for my tutorials
|
You get the materials here
|
| ||
4 Selections are included in the materials, they should be placed in the PSP Selections Folder.
One Plugin is required
Alien Skin Eye Candy 5: Impact / Perspective Shadow
I used the following Colors
Color 1 #af0e03
Color 2 #5a0800
One Plugin is required
Alien Skin Eye Candy 5: Impact / Perspective Shadow
I used the following Colors
Color 1 #af0e03
Color 2 #5a0800

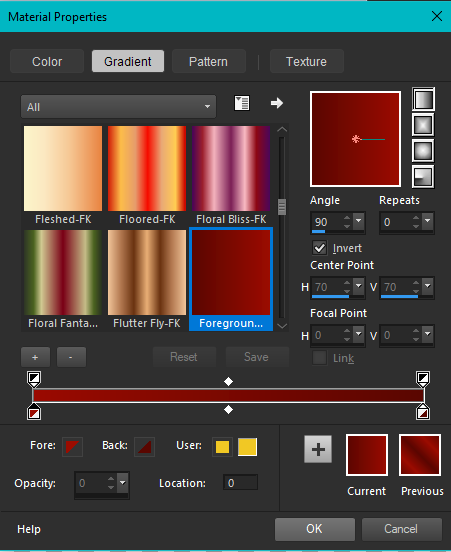
Make a Linear Gradient on the Foreground Color
(with these settings)
(with these settings)
Let us begin
1
Open a New Image 1000 x 700
Flood Fill with the Gradient
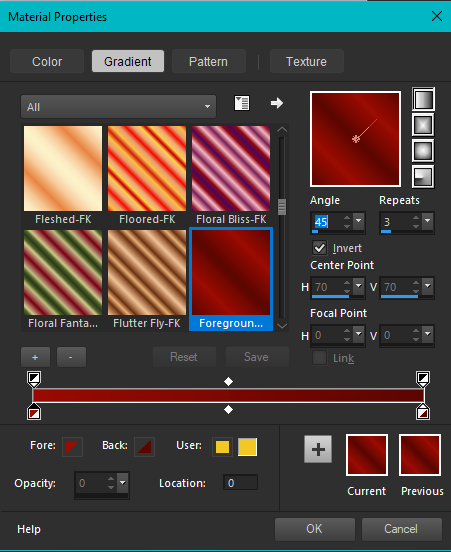
Change the Gradient but still with the same Colors
(with these settings)
(you must use it when I ask you to Flood Fill with the Gradient through the rest of the Tutorial)
1
Open a New Image 1000 x 700
Flood Fill with the Gradient
Change the Gradient but still with the same Colors
(with these settings)
(you must use it when I ask you to Flood Fill with the Gradient through the rest of the Tutorial)
2
Layers / New Raster Layer
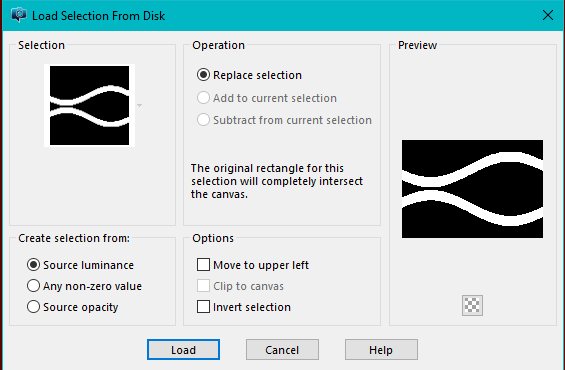
Selections / Load/Save Selection / Load Selection from Disk
(with these settings)
Locate / kw 2 circles 1
Layers / New Raster Layer
Selections / Load/Save Selection / Load Selection from Disk
(with these settings)
Locate / kw 2 circles 1
Flood Fill with the Gradient / both Selections
Layers / Duplicate
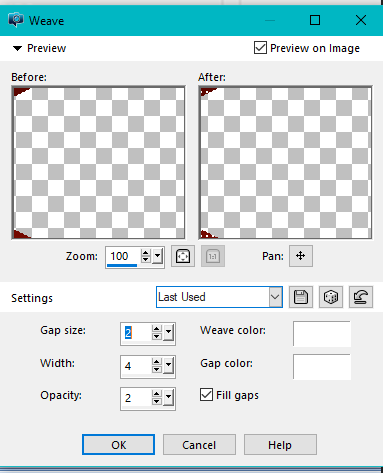
Effects / Texture Effects / Weave
(with these settings)
Layers / Duplicate
Effects / Texture Effects / Weave
(with these settings)
Selections / Select None
Layers / Properties Opacity 45
Layers / Merge / Merge Down
Effects / 3d Effects / Drop Shadow / 5 / 6 / 50 / 25 Black
Repeat the Drop Shadow with minus -5 / -6
3
Layers / New Raster Layer
Selections / Load/Save Selection / Load Selection from Disk
same settings as Step 2
Locate / kw 2 circles 2
Flood Fill with the Gradient
Layers / Duplicate
Effects / Texture Effects / Weave
same settings as Step 2
Layers / Properties / Opacity 45
Selections / Modify / Contract by 85
Press the Delete Key on the Keyboard
Keep Selected
Selections / Modify / Expand by 10
Layers / New Raster Layer
Flood Fill with the Foreground Color
Selections / Select None
Layers / Arrange / Move Down x2
Activate the Top Raster Layer
Layers / Merge / Merge Down x2
Effects / 3d Effects / Drop Shadow with these settings / 5 / 6 / 50 / 25 Black
Repeat the Drop Shadow with minus -5 / -6
4
Open / kw/blomster/26/1/21/18_orig.png (flower)
Edit / Copy
Edit / Paste as a New Layer
Image / Resize 3x90
Place as in the Example
5
Layers / New Raster Layer
Selections / Load/Save Selection / Load Selection from Disk
Locate / kw 2 circles 3
same settings as Step 3
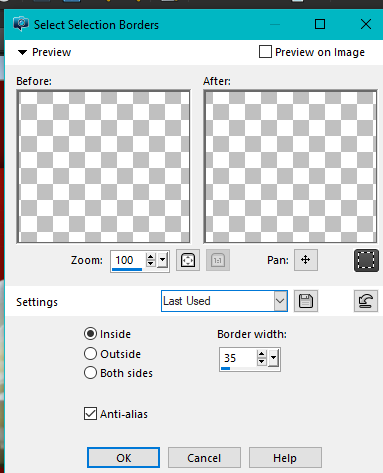
Selections / Modify / Select Selection Borders
(with these settings)
Layers / Properties Opacity 45
Layers / Merge / Merge Down
Effects / 3d Effects / Drop Shadow / 5 / 6 / 50 / 25 Black
Repeat the Drop Shadow with minus -5 / -6
3
Layers / New Raster Layer
Selections / Load/Save Selection / Load Selection from Disk
same settings as Step 2
Locate / kw 2 circles 2
Flood Fill with the Gradient
Layers / Duplicate
Effects / Texture Effects / Weave
same settings as Step 2
Layers / Properties / Opacity 45
Selections / Modify / Contract by 85
Press the Delete Key on the Keyboard
Keep Selected
Selections / Modify / Expand by 10
Layers / New Raster Layer
Flood Fill with the Foreground Color
Selections / Select None
Layers / Arrange / Move Down x2
Activate the Top Raster Layer
Layers / Merge / Merge Down x2
Effects / 3d Effects / Drop Shadow with these settings / 5 / 6 / 50 / 25 Black
Repeat the Drop Shadow with minus -5 / -6
4
Open / kw/blomster/26/1/21/18_orig.png (flower)
Edit / Copy
Edit / Paste as a New Layer
Image / Resize 3x90
Place as in the Example
5
Layers / New Raster Layer
Selections / Load/Save Selection / Load Selection from Disk
Locate / kw 2 circles 3
same settings as Step 3
Selections / Modify / Select Selection Borders
(with these settings)
Flood Fill with the Gradient
Layers / Duplicate
Effects / Texture Effects / Weave
(same settings as Step 2)
Layers / Properties / Opacity 45
Layers / Merge / Merge Down
Selections / Select None
Effects / 3d Effects / Drop Shadow with these settings / 5 / 6 / 50 / 25 Black
Repeat the Drop Shadow with minus -5 / -6
6
Layers / New Raster Layer
Selections – Load/Save Selection / Load Selection from Disk
Locate / kw 2 circles 4
(same settings as Step 3)
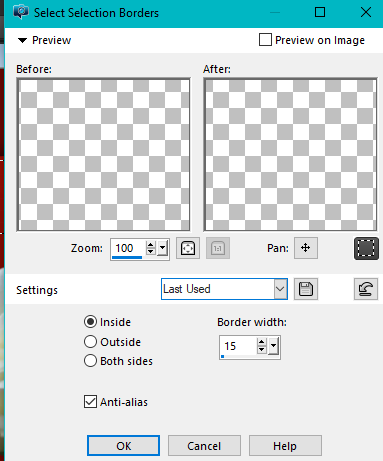
Selections / Modify / Select Selection Borders
(with these settings)
Layers / Duplicate
Effects / Texture Effects / Weave
(same settings as Step 2)
Layers / Properties / Opacity 45
Layers / Merge / Merge Down
Selections / Select None
Effects / 3d Effects / Drop Shadow with these settings / 5 / 6 / 50 / 25 Black
Repeat the Drop Shadow with minus -5 / -6
6
Layers / New Raster Layer
Selections – Load/Save Selection / Load Selection from Disk
Locate / kw 2 circles 4
(same settings as Step 3)
Selections / Modify / Select Selection Borders
(with these settings)
Flood Fill with Color 1 #af0e03
Layers / Duplicate
Effects / Texture Effects / Weave
(same settings as Step 2)
Layers / Properties / Opacity 45
Layers / Merge / Merge Down
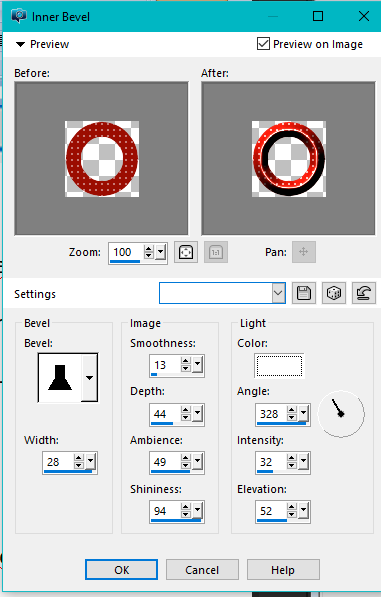
Effects / 3d Effects / Inner Bevel
(with these settings)
Layers / Duplicate
Effects / Texture Effects / Weave
(same settings as Step 2)
Layers / Properties / Opacity 45
Layers / Merge / Merge Down
Effects / 3d Effects / Inner Bevel
(with these settings)
Selections / Select None
Effects / 3d Effects / Drop Shadow with these settings / 5 / 6 / 50 / 25 Black
Repeat the Drop Shadow with minus -5 / -6
Layers Duplicate x2
Place as in the Example
Layers Merge Down x2
Layers / Properties / Blend Mode / Luminance
7
Open the Tube / 5172-luzcristina.pspimage
Edit / Copy
Edit / Paste as a New Layer
Image / Mirror Horizontal (Mirror in previous versions)
Place as in the Example
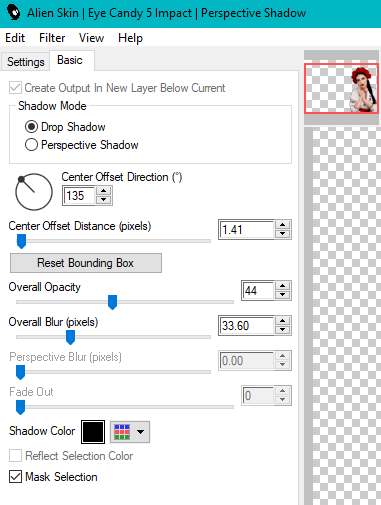
Effects / Plugins / Alien Skin Eye Candy 5 impact / Perspective Shadow
(with these settings)
Effects / 3d Effects / Drop Shadow with these settings / 5 / 6 / 50 / 25 Black
Repeat the Drop Shadow with minus -5 / -6
Layers Duplicate x2
Place as in the Example
Layers Merge Down x2
Layers / Properties / Blend Mode / Luminance
7
Open the Tube / 5172-luzcristina.pspimage
Edit / Copy
Edit / Paste as a New Layer
Image / Mirror Horizontal (Mirror in previous versions)
Place as in the Example
Effects / Plugins / Alien Skin Eye Candy 5 impact / Perspective Shadow
(with these settings)
8
Image / Add Borders / 2-pixels White
Open the Tube / accents_Dani05.pspImage
Activate the Layer / Ebene 18
Edit / Copy
Edit / Paste as a New Layer
Image / Free Rotate / Left 90º
(with these settings)
Image / Add Borders / 2-pixels White
Open the Tube / accents_Dani05.pspImage
Activate the Layer / Ebene 18
Edit / Copy
Edit / Paste as a New Layer
Image / Free Rotate / Left 90º
(with these settings)

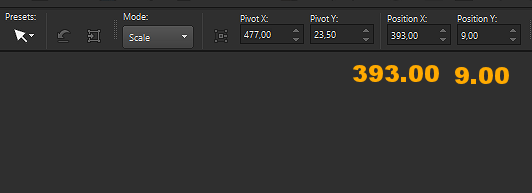
Press ‘k’ to Activate the Pick Tool
Position X 393 and Position Y 9.00
(see the Example below)
Position X 393 and Position Y 9.00
(see the Example below)
Press ‘m’ to close the Pick Tool
Layers / Duplicate
Move it to the Right
Layers / Merge / Merge Down
Layers / Duplicate
Layers / Merge / Merge Down
Layers / Duplicate
Press ‘k’ to Activate the Pick Tool
Position X 126.00 and Position Y 668
(see the Example below)
Layers / Duplicate
Move it to the Right
Layers / Merge / Merge Down
Layers / Duplicate
Layers / Merge / Merge Down
Layers / Duplicate
Press ‘k’ to Activate the Pick Tool
Position X 126.00 and Position Y 668
(see the Example below)

Press ‘m’ to close the Pick Tool
9
Open the Tube / kw deco 1
Edit / Copy
Edit / Paste as a New Layer
Place as in the Example
10
Image / Add Borders 40-pixels in a Color you do not have in the Image
Activate the Magic Wand and Select the 40-pixel Border
Flood Fill with the Gradient
Selections / Invert
Effects / 3d Effects / Drop Shadow with these settings / 5 / 6 / 50 / 25 Black
Repeat the Drop Shadow with minus -5 / -6
Selections / Select None
Add your name or watermark
Save as jpg
Hugs Dennis
|
Dennis b tag
|
Karin b Tags

|
