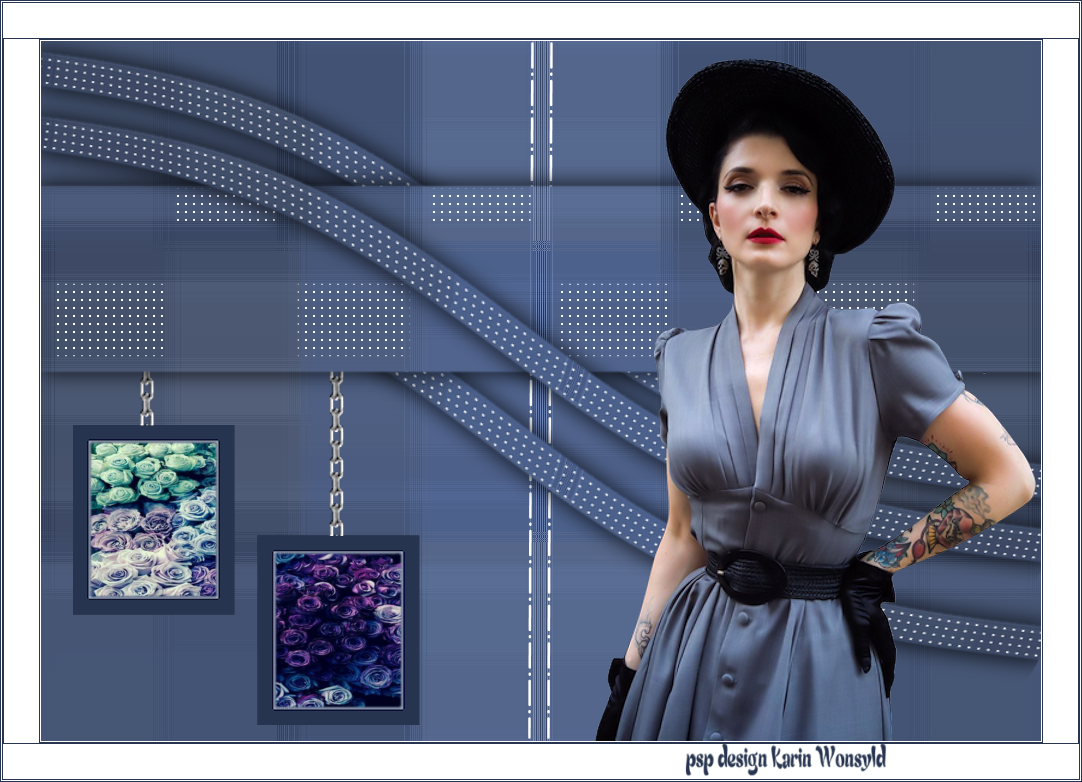
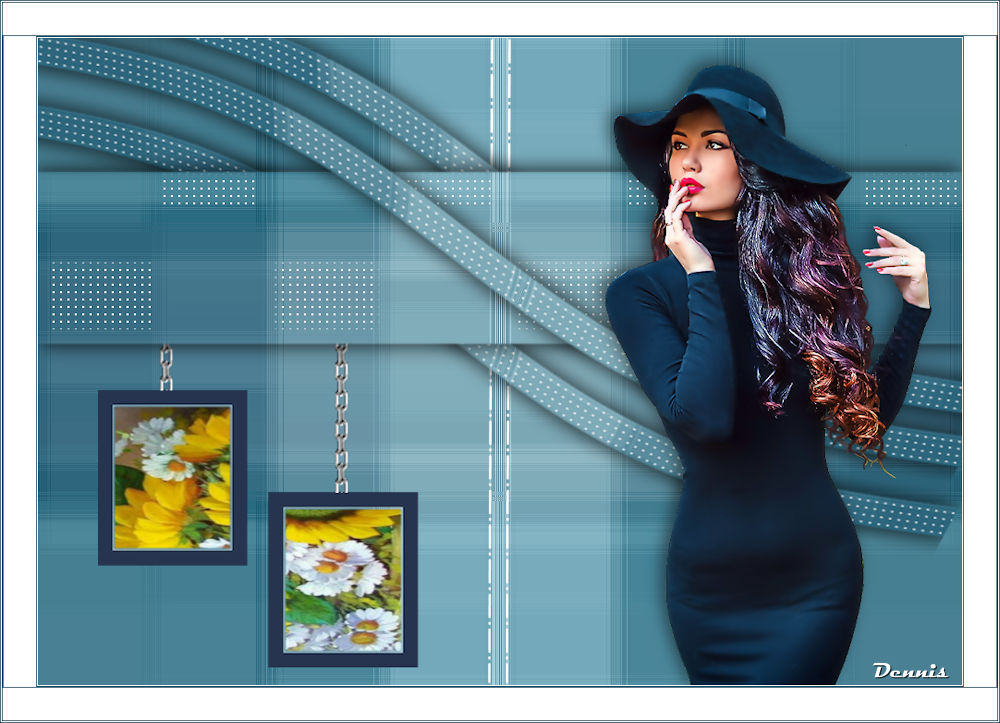
The lady in the blue dress
|
here you will find the original tutorials from Karin
|

|
|
Materials
|
| ||
you will need to use the own tube.
Thanks to Martha smart design because I get to use the tubes in my Tutorials
You get three Selections
Place them in the folder the PSP File Folder / Selections
I used the following Colors
Color 1 #a0afce
Color 2 #5a74ac
Color 3 #283550
As well as White
Thanks to Martha smart design because I get to use the tubes in my Tutorials
You get three Selections
Place them in the folder the PSP File Folder / Selections
I used the following Colors
Color 1 #a0afce
Color 2 #5a74ac
Color 3 #283550
As well as White

You will need these Plugins
Mehdi / Wavy Lab 1.1
Filters Unlimited 2.0 / Deformation / Alias
Mehdi / Sorting Tiles
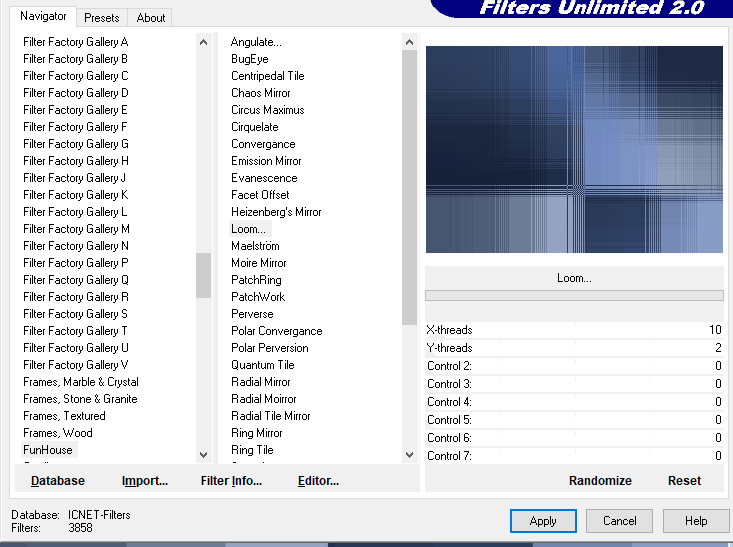
Filters Unlimited 2.0 / Funhouse / Loom
Filters Unlimited 2.0 / Simple / 4 Way Average
Let us begin
1
Open a New Image 1000 x 700
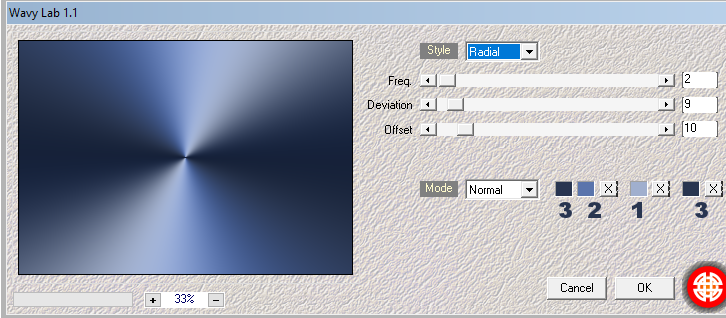
Plugins / Mehdi / Wavy Lab 1.1
(with these settings)
Mehdi / Wavy Lab 1.1
Filters Unlimited 2.0 / Deformation / Alias
Mehdi / Sorting Tiles
Filters Unlimited 2.0 / Funhouse / Loom
Filters Unlimited 2.0 / Simple / 4 Way Average
Let us begin
1
Open a New Image 1000 x 700
Plugins / Mehdi / Wavy Lab 1.1
(with these settings)
Adjust / Blur / Gaussian Blur 30
2
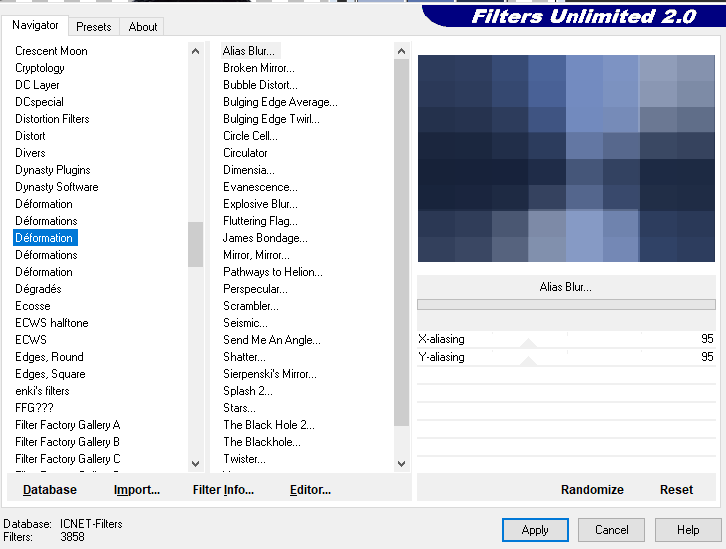
Filters Unlimited 2.0 / Deformation / Alias Blur
(with these settings)
2
Filters Unlimited 2.0 / Deformation / Alias Blur
(with these settings)
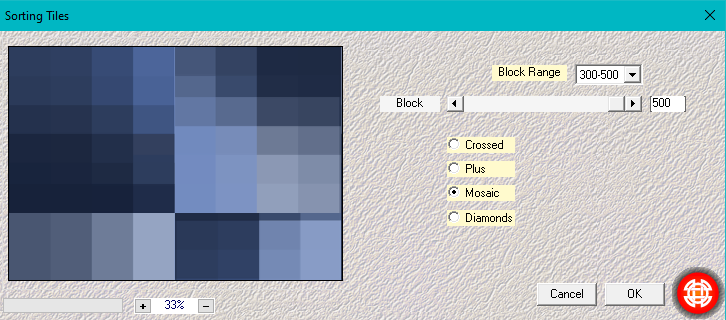
Plugins / Mehdi / Sorting Tiles
(with these settings
(with these settings
Filters Unlimited 2.0 / Funhouse / Loom (default)
Filters Unlimited 2.0 / Simple / 4 Way Average
4
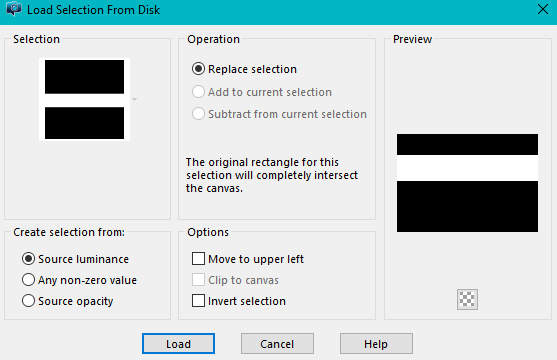
Selections / Load /Save Selection / Load Selections from Disk
(with these settings)
Locate / The lady in the blue dress
4
Selections / Load /Save Selection / Load Selections from Disk
(with these settings)
Locate / The lady in the blue dress
Selections / Promote Selection to Layer
Selections / Select None
5
Stay on this Layer (Promoted Selection Layer)
Selections / Load /Save Selection / Load Selections from Disk
Locate The lady in the blue dress 1
(same settings as Step 4)
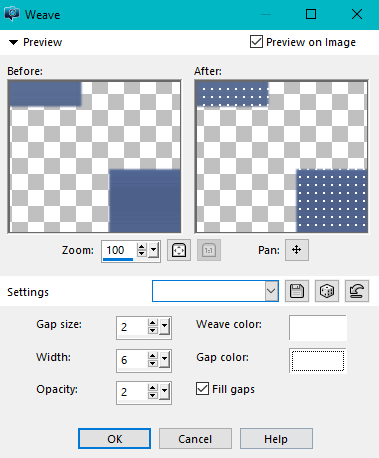
Effects / Texture Effects / Weave
(with these settings)
Selections / Select None
5
Stay on this Layer (Promoted Selection Layer)
Selections / Load /Save Selection / Load Selections from Disk
Locate The lady in the blue dress 1
(same settings as Step 4)
Effects / Texture Effects / Weave
(with these settings)
Selections / Select None
Effects / 3d Effects / Drop Shadow 5 / 6 / 50 / 25 Black
(Repeat the Drop Shadow)
Effects / 3d Effects / Drop Shadow / -5 / -6 / 50 / 25 Black
6
Activate the Bottom Raster Layer
Selections / Load /Save Selection / Load Selections from Disk
Locate / The lady in the blue dress 2
(same settings as Step 4)
Selections / Promote Selections to Layer
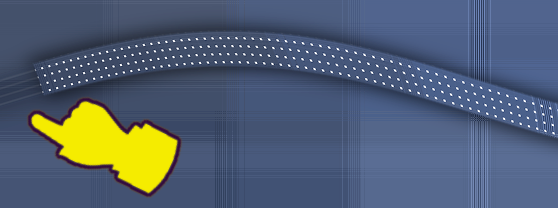
Effects / Texture Effects / Weave
(same settings as Step 5)
Selections / Select None
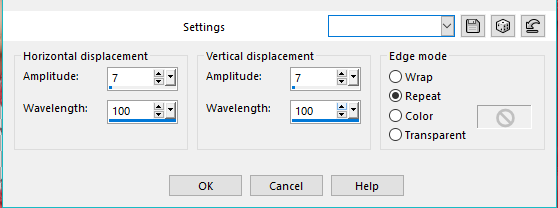
Effects / Distortion Effects / Wave
(with these settings)
Effects / 3d Effects / Drop Shadow 5 / 6 / 50 / 25 Black
(Repeat the Drop Shadow)
Effects / 3d Effects / Drop Shadow / -5 / -6 / 50 / 25 Black
6
Activate the Bottom Raster Layer
Selections / Load /Save Selection / Load Selections from Disk
Locate / The lady in the blue dress 2
(same settings as Step 4)
Selections / Promote Selections to Layer
Effects / Texture Effects / Weave
(same settings as Step 5)
Selections / Select None
Effects / Distortion Effects / Wave
(with these settings)
Effects / 3d Effects / Drop Shadow / 5 / 6 / 50 / 25 Black
(Repeat the Drop Shadow)
Effects / 3d Effects / Drop Shadow / -5 / -6 / 50 / 25 Black
If it looks like below then move to the left edge
(Repeat the Drop Shadow)
Effects / 3d Effects / Drop Shadow / -5 / -6 / 50 / 25 Black
If it looks like below then move to the left edge
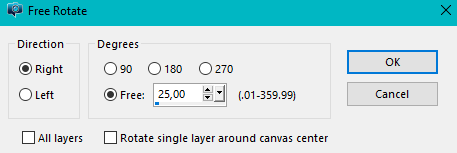
7
Image / Free Rotate / Right 25º
(with these settings)
Image / Free Rotate / Right 25º
(with these settings)
Pull it up (see example below)

Activate the Pick Tool and pull out to the right
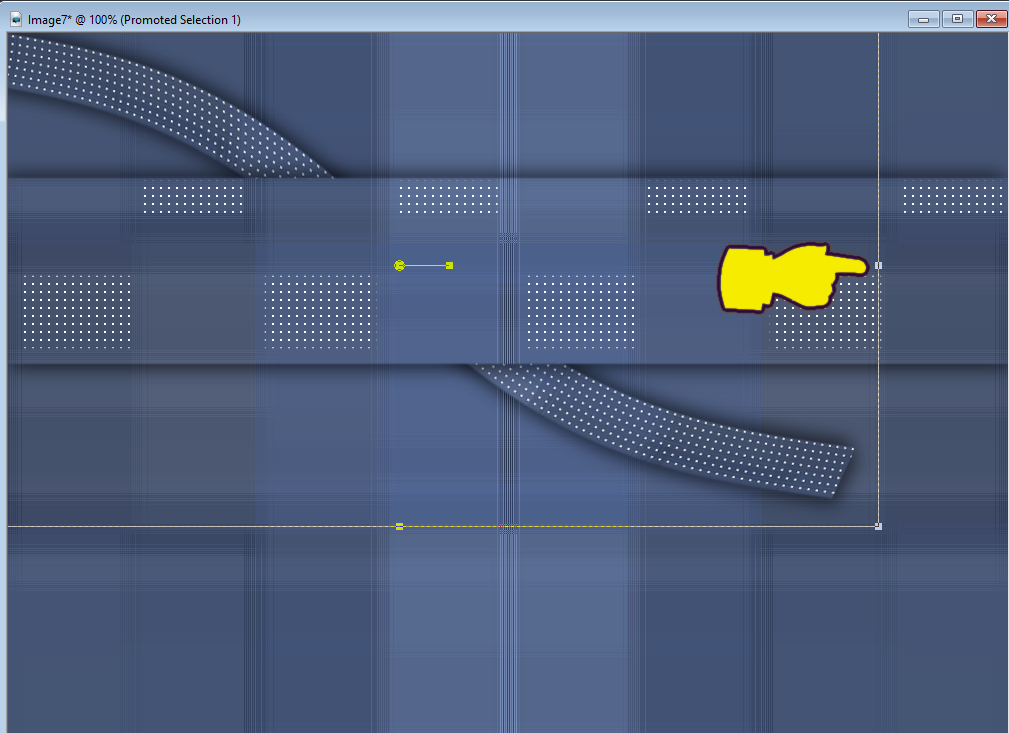
Now it looks like this
8
Layers / Duplicate 2x
Move the Middle Duplicate Layers to the Top
Arrange them as on the print below
Layers / Duplicate 2x
Move the Middle Duplicate Layers to the Top
Arrange them as on the print below

9
Activate the Bottom Raster Layer
Open the tube 3 Frame N Chain Holder ~ ReiN
Edit / Copy Special / Copy Merged
Edit / Paste as a New Layer
Stay on the Layer with the 3 frames
Activate the Easer Tool / Erase the Frame on the far right
Place as in the Example
10
Close the Eye on the Lower Raster Layer
Activate the Magic Wand set Feather to 2
Select inside the frames
Selections / Modify / Expand by 2
Activate the Bottom Raster Layer
Layers / New Raster Layer
Stay on this Raster Layer
Open the Background c89bb5a94892795118f33cd6c577ac0f
that is included in the materials
Layers / Promote Background Layer
Edit / Copy
Edit / Paste into Selection
Selections / Select None
Open the Eye on the Lower Raster Layer
11
Activate the Bottom Raster Layer
Open the tube kw deco 1
Edit / Copy
Edit / Paste as a New Layer
12
Activate the Top Raster Layer
Find a lady tube you like
Edit / Copy
Edit / Paste as a New Layer
Resize if necessary
13
Image / Add Borders 1-pixel White
Image / Add Borders 1-pixel Color 3 #283550
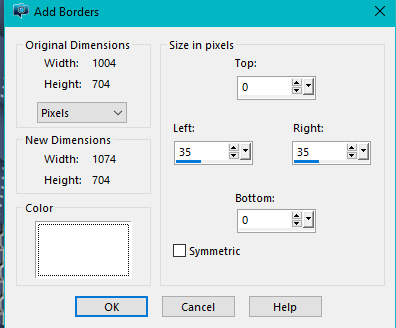
Image / Add Borders / (Symmetric Not Checked) Color White
(with these settings)
Activate the Bottom Raster Layer
Open the tube 3 Frame N Chain Holder ~ ReiN
Edit / Copy Special / Copy Merged
Edit / Paste as a New Layer
Stay on the Layer with the 3 frames
Activate the Easer Tool / Erase the Frame on the far right
Place as in the Example
10
Close the Eye on the Lower Raster Layer
Activate the Magic Wand set Feather to 2
Select inside the frames
Selections / Modify / Expand by 2
Activate the Bottom Raster Layer
Layers / New Raster Layer
Stay on this Raster Layer
Open the Background c89bb5a94892795118f33cd6c577ac0f
that is included in the materials
Layers / Promote Background Layer
Edit / Copy
Edit / Paste into Selection
Selections / Select None
Open the Eye on the Lower Raster Layer
11
Activate the Bottom Raster Layer
Open the tube kw deco 1
Edit / Copy
Edit / Paste as a New Layer
12
Activate the Top Raster Layer
Find a lady tube you like
Edit / Copy
Edit / Paste as a New Layer
Resize if necessary
13
Image / Add Borders 1-pixel White
Image / Add Borders 1-pixel Color 3 #283550
Image / Add Borders / (Symmetric Not Checked) Color White
(with these settings)
14
Image / Add Borders 1-pixel (Symmetric Checked) Color 3 #283550
Image / Add Borders / (Symmetric Not Checked) Color White
(with these settings)
Image / Add Borders 1-pixel (Symmetric Checked) Color 3 #283550
Image / Add Borders / (Symmetric Not Checked) Color White
(with these settings)
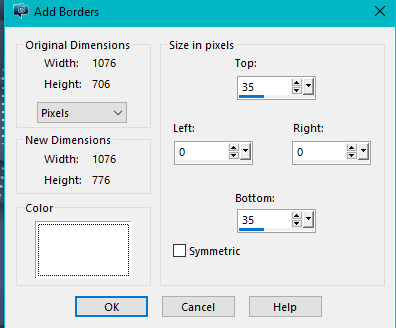
Image / Add Borders 1-pixel / (Symmetric Checked) Color 3 #283550
Image / Add Borders 1-pixel / (Symmetric Checked) White
Image / Add Borders 1-pixel / (Symmetric Checked) Color 3 #283550
Add the name or watermark
Save as jpg
Hugs Dennis
Image / Add Borders 1-pixel / (Symmetric Checked) White
Image / Add Borders 1-pixel / (Symmetric Checked) Color 3 #283550
Add the name or watermark
Save as jpg
Hugs Dennis
|
Karin b tags
|
Dennis b tags
|
