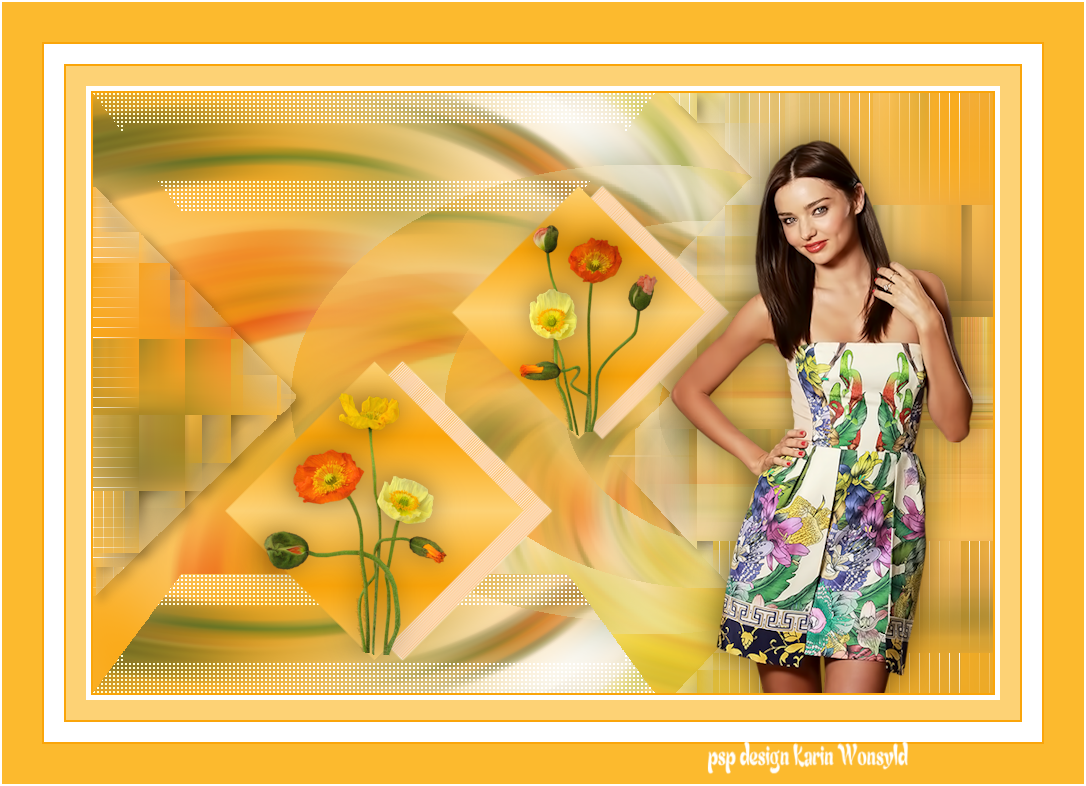
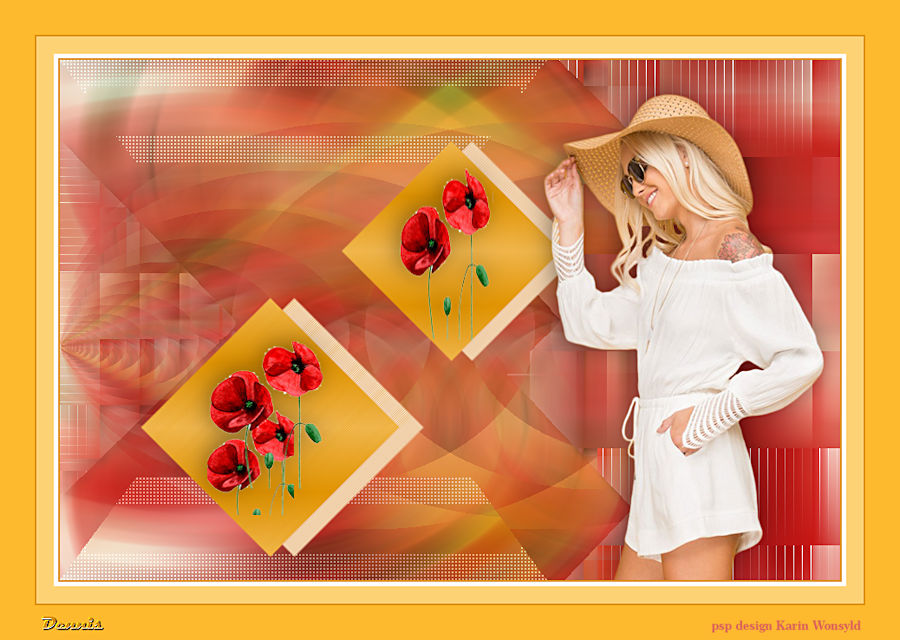
Poppies in Orange
|
here you will find the original tutorials from Karin
|

|
|
You get your materials here
|
You will need the following Plugins
AP [Lines] / Lines / SilverLining
Filters Unlimited 2.0 / Toadies / Weaver
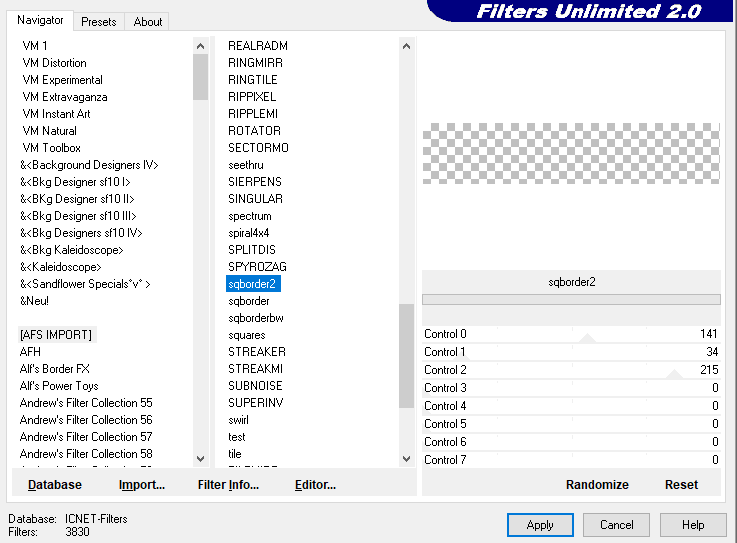
Filters Unlimited 2.0 / (AFS IMPORT) / sqborder 2
Alien Skin / Eye Candy 5 Impact / Perspective Shadow
Lady tube of your choice
I found my tube from http://ma/galerie/paintshop/pro.eklablog.com/accueil/c18455092
http://ma/galerie/paintshop/pro.eklablog.com/tubes/femmes/c28759432/4
You get an Alpha Channel poppies in orange
Open the Alpha Channel / Window / Duplicate
We will work on the Copy, if something goes wrong, you still have the Original.
I used these Colors
Color
1 #fdd275
Color 2 #fcba2e
Color 3 #faa50a
Color 4 #ffffff
AP [Lines] / Lines / SilverLining
Filters Unlimited 2.0 / Toadies / Weaver
Filters Unlimited 2.0 / (AFS IMPORT) / sqborder 2
Alien Skin / Eye Candy 5 Impact / Perspective Shadow
Lady tube of your choice
I found my tube from http://ma/galerie/paintshop/pro.eklablog.com/accueil/c18455092
http://ma/galerie/paintshop/pro.eklablog.com/tubes/femmes/c28759432/4
You get an Alpha Channel poppies in orange
Open the Alpha Channel / Window / Duplicate
We will work on the Copy, if something goes wrong, you still have the Original.
I used these Colors
Color
1 #fdd275
Color 2 #fcba2e
Color 3 #faa50a
Color 4 #ffffff

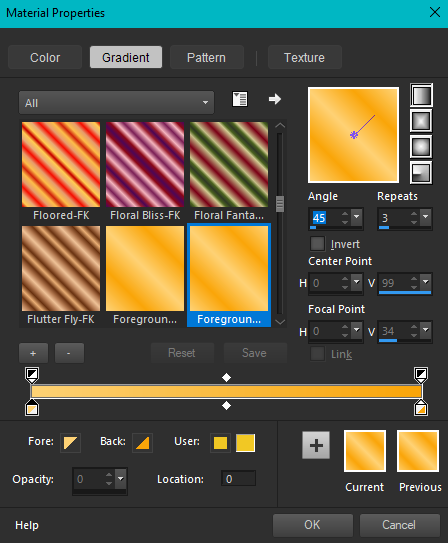
Set your Foreground Color to Color 4 #ffffff
Background Color to Color 3 #faa50a
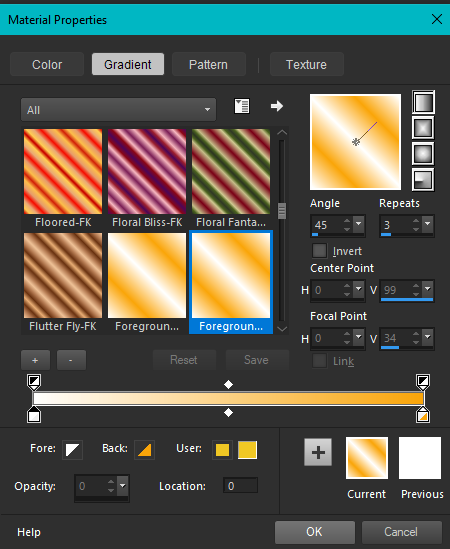
Make a Linear Gradient (with the following settings)
Background Color to Color 3 #faa50a
Make a Linear Gradient (with the following settings)
Let us begin
1.
Open your Alpha Channel poppies in orange
Copy it by pressing Shift + D on the keyboard / or Window / Duplicate
Close the Original
We will work on the Copy if something goes wrong, we still have the Original.
2.
Flood Fill with the Gradient
Selections / Select All
Open the tube Mtm Bloemen 208 /20 Mei 2007.pspimage
Edit / Copy
Edit / Paste into Selection
Selections / Select None
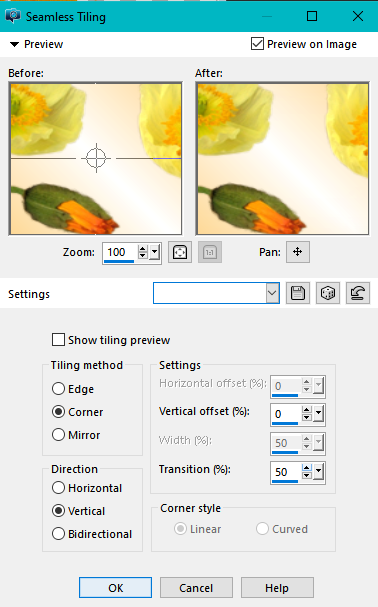
Effects / Image Effects / Seamless Tiling (with the following settings)
1.
Open your Alpha Channel poppies in orange
Copy it by pressing Shift + D on the keyboard / or Window / Duplicate
Close the Original
We will work on the Copy if something goes wrong, we still have the Original.
2.
Flood Fill with the Gradient
Selections / Select All
Open the tube Mtm Bloemen 208 /20 Mei 2007.pspimage
Edit / Copy
Edit / Paste into Selection
Selections / Select None
Effects / Image Effects / Seamless Tiling (with the following settings)
3.
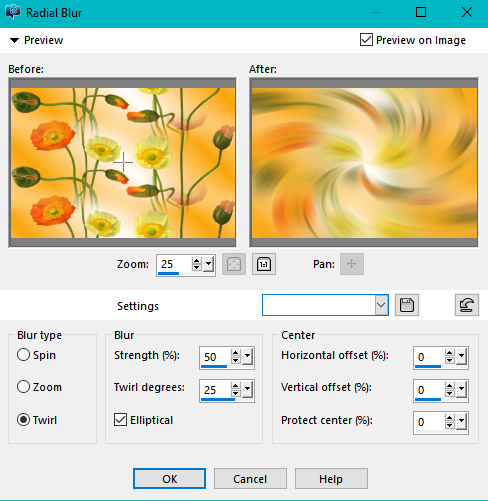
Adjust / Blur / Radial Blur (with the following settings)
Adjust / Blur / Radial Blur (with the following settings)
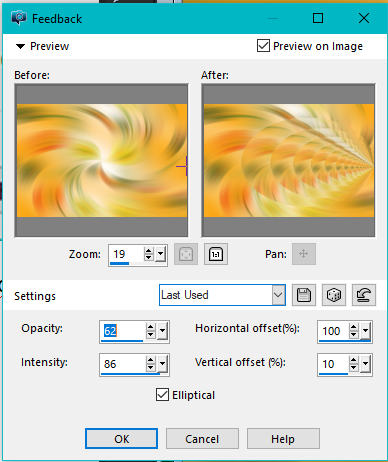
Effects / Reflection Effects / Feedback (with the following settings)
4.
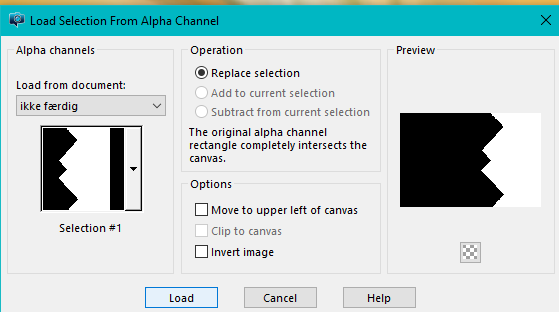
Selection / Load/Save Selection / Load Selections from alpha channel
Use #1 (with the following settings)
Selection / Load/Save Selection / Load Selections from alpha channel
Use #1 (with the following settings)
Selections / Promote Selection to Layer
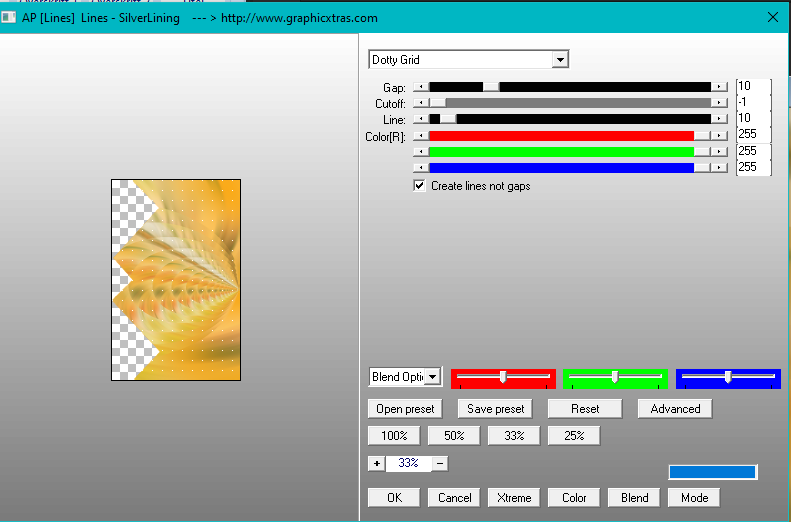
Plugins / AP [Lines] / Lines / SilverLining
(with the following settings)
Plugins / AP [Lines] / Lines / SilverLining
(with the following settings)
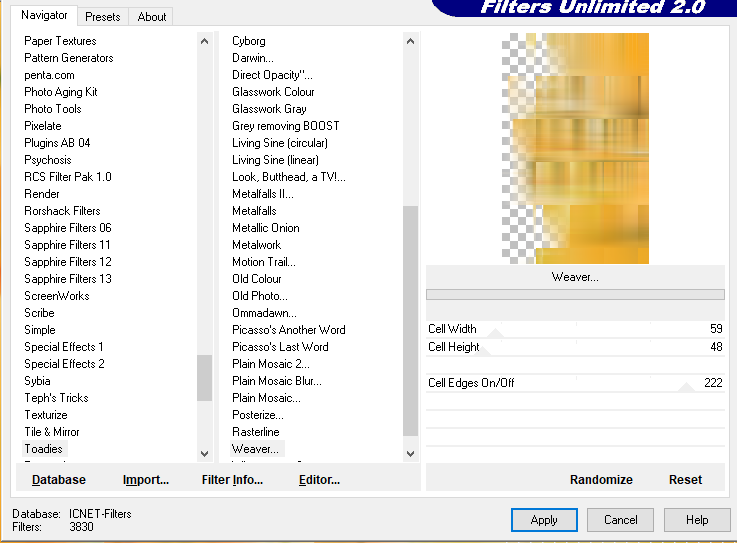
Plugins / Filters Unlimited 2.0 / Toadies / Weaver (default)
(with the following settings)
(with the following settings)
Selections/ Select None
Effects / 3D Effects / Drop Shadow with these settings 5 / 6 / 40 / 13 Black
5.
Activate the Bottom Raster Layer
Selection / Load/Save Selection / Load Selection from alpha channel
Use #2 Same settings Step 4
Selections / Promote Selections to Layer
Effects / Plugins / Filters Unlimited 2.0 / (AFS IMPORT) / sqborders 2 (default) (with the following settings)
Selections / Select None
Layers / Duplicate
Image / Mirror Vertical (flip in earlier versions)
6.
Activate the Bottom Raster Layer
Selection / Load/Save Selection / Load Selections from alpha channel
Use #3 with the same settings as Step 4
Selection / Promote Selections to Layer
Effects / Plugins / AP [Lines] Lines / SilverLining
same settings as Step 3
Effects / Plugins / Filters Unlimited 2.0 / Toadies / Weaver
same settings as Step 4
Selection / Select None
Effects / 3d Effects / Drop Shadow / 5 / 6 / 40 / 13 Black
7.
Set your Foreground Color to Color 1 #fdd275 / Background Color to Color 3 #faa50a
Make a Linear Gradient (with the following settings)
Activate the Top Raster Layer
Layers / New Raster Layer
Selection / Load/Save Selection / Load Selections from alpha channel
Use #4 same settings as point 4
Flood Fill with the Gradient
Selections / Select None
8.
Effects / 3d Effects / Drop Shadow / 30 / 30 / 100 / 2 White
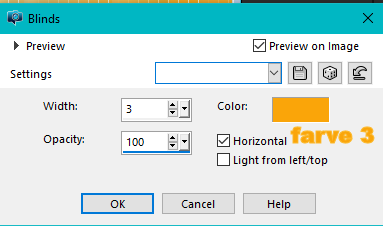
Activate the Magic Wand and Select the frame (the White portion)
Effects / Texture Effects / Blinds (with the following settings)
Selections / Select None
Image / Resize 65/%
Layers / Duplicate
Image / Resize 85/%
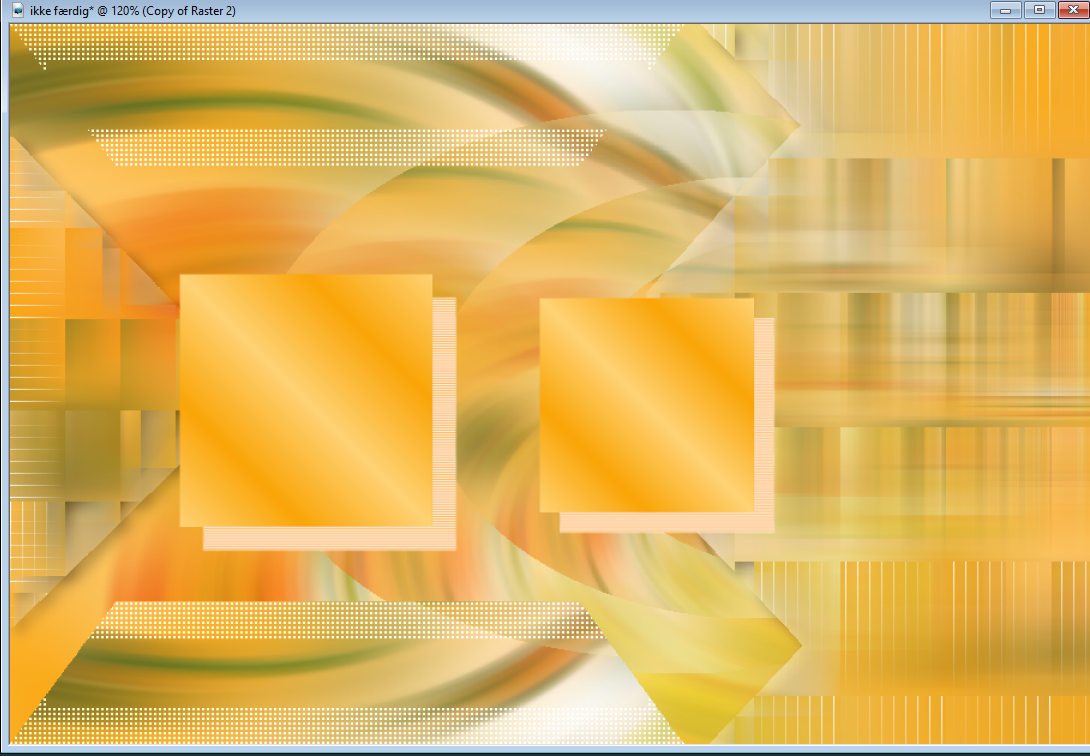
Place as in the Example
Image / Resize 65/%
Layers / Duplicate
Image / Resize 85/%
Place as in the Example
Layers / Merge Down
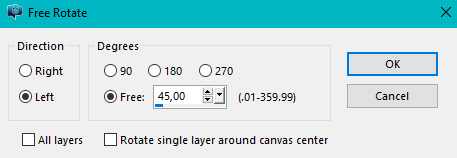
Image / Free Rotate (with the following settings)
Image / Free Rotate (with the following settings)
9.
Open the tube Mtm_Bloemen 208/20 Mei 2007
Activate the Freehand Selection Tool and select the flower to the left
Open the tube Mtm_Bloemen 208/20 Mei 2007
Activate the Freehand Selection Tool and select the flower to the left
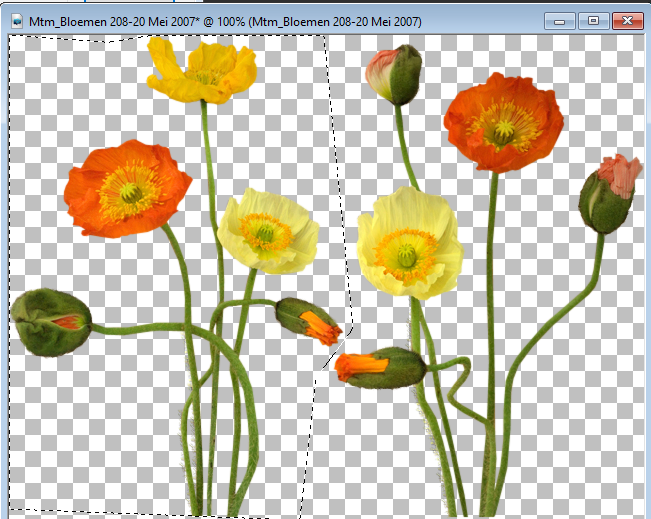
Edit / Copy
Edit Paste as a New Layer
Image Resize 1 x 55%
Place In the lower frame
Take your Eraser Tool and Erase what’s outside of the frame
Open your tube Mtm Bloemen 208/20 May 2007
Activate the Freehand Selection Tool
And make a Selection around the flower to the right
Edit / Copy
Edit / Paste as a New Layer
Image Resize 1 x 45%
Place in the top frame
Activate the Eraser Tool and erase what is outside of the frame
Layers / Merge Down
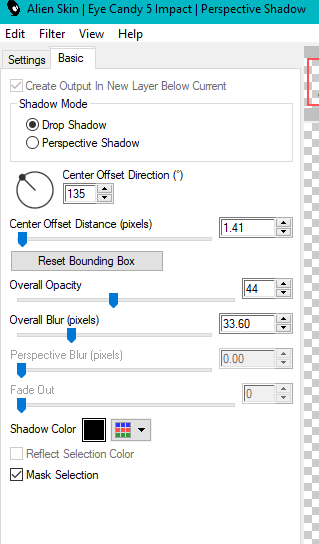
Effects / Plugins / Alien Skin / Eye Candy 5 Impact Perspective Shadow
(with the following settings)
Edit Paste as a New Layer
Image Resize 1 x 55%
Place In the lower frame
Take your Eraser Tool and Erase what’s outside of the frame
Open your tube Mtm Bloemen 208/20 May 2007
Activate the Freehand Selection Tool
And make a Selection around the flower to the right
Edit / Copy
Edit / Paste as a New Layer
Image Resize 1 x 45%
Place in the top frame
Activate the Eraser Tool and erase what is outside of the frame
Layers / Merge Down
Effects / Plugins / Alien Skin / Eye Candy 5 Impact Perspective Shadow
(with the following settings)
10
Open the Tube Femme 660 by Lily (which you will find on the website I linked to in the beginning)
Or use a lady of your choice
Edit / Copy
Edit / Paste as a New Layer
Image Resize 2 x 90%
Effects / Plugins / Alien Skin / Eye Candy 5 Impact / Perspective Shadow
Same settings as Step 9
Place as in the Example
11.
Image / Add Borders 2-pixels in Color 3 #faa50a
Image / Add Borders 5-pixels in Color 4 #ffffff
Image / Add Borders 20-pixels in Color 1 #fdd275
Image / Add Borders 2-pixels in Color 3 #faa50a
Image / Add Borders 20-pixels in Color 4 #ffffff
Image / Add Borders 2-pixels in Color 3 #faa50a
Image / Add Borders 40-pixels in Color 2 #fcba2e
Image / Add Borders 2-pixels in Color 4 #ffffff
Add your name or watermark
File / Export jpg Optimizer
Hugs Dennis
|
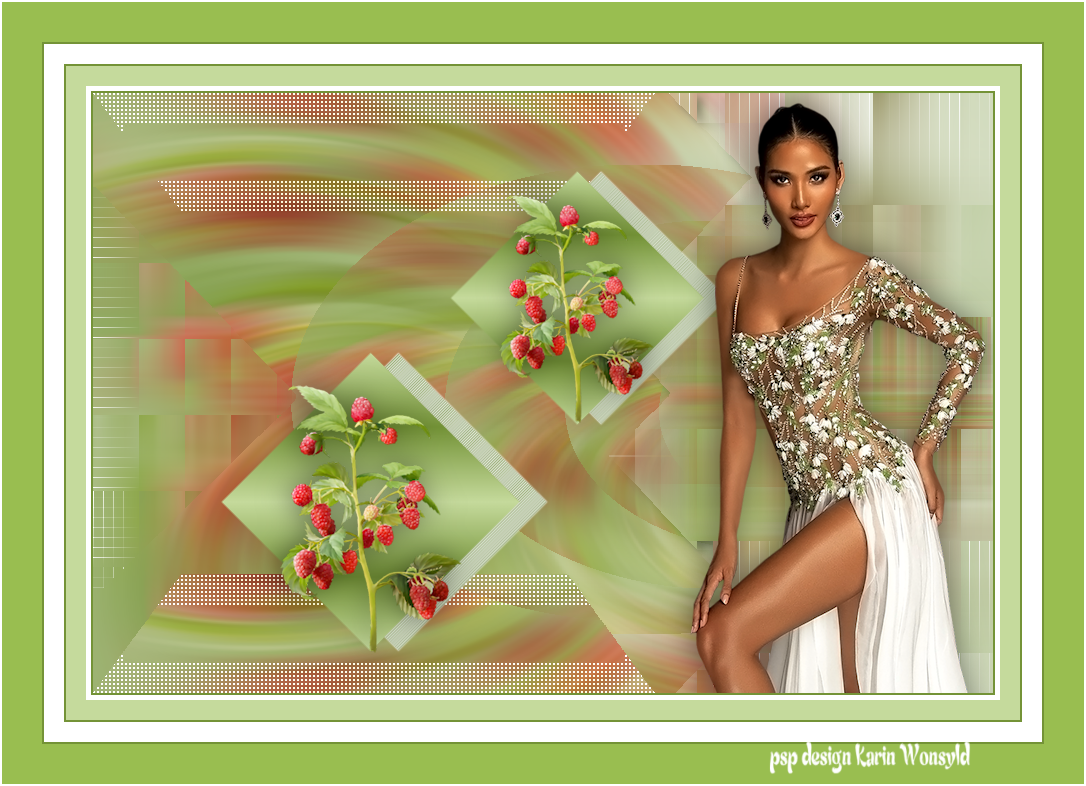
Dennis b tags
Karins b tags
|
dennis c tags
|
|
