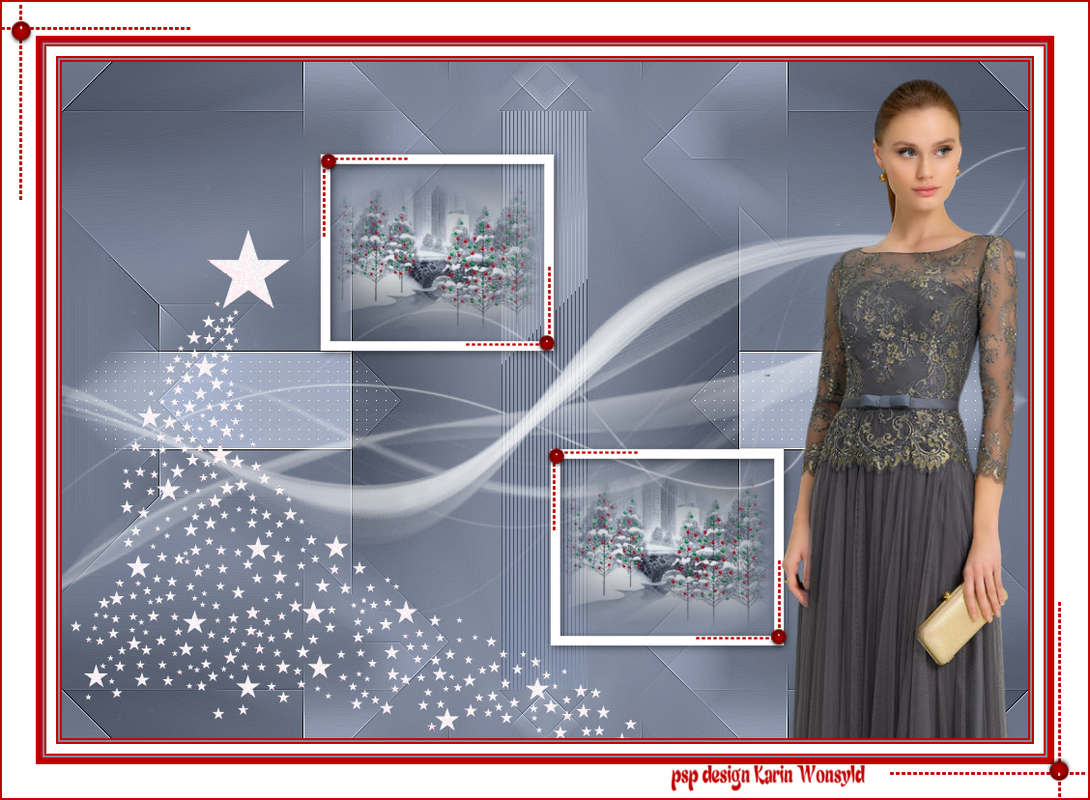
Christmas in the City
|
here you will find the original tutorials from Karin
|

|
|
you get your materials here
|
| ||
you get 3 Selections they should be placed in the PSP / Selections Folder
the lady is from smart design
Not included in the Materials. You need to use your own lady tube.
I used the following Colors
Color 1 #ced3dc
Color 2 #848c9e
Color 3 #ffffff
And
Color 4 #c00000 used in the frame
the lady is from smart design
Not included in the Materials. You need to use your own lady tube.
I used the following Colors
Color 1 #ced3dc
Color 2 #848c9e
Color 3 #ffffff
And
Color 4 #c00000 used in the frame

Du skal bruge disse plugins
Plugins / Mehdi / Sorting Tiles
Plugins / Filters Unlimited 2.0 / & Bkg Kaleidoscope / 4QFlip UpperL
Effects / Plugins / AP [Lines] SilverLining
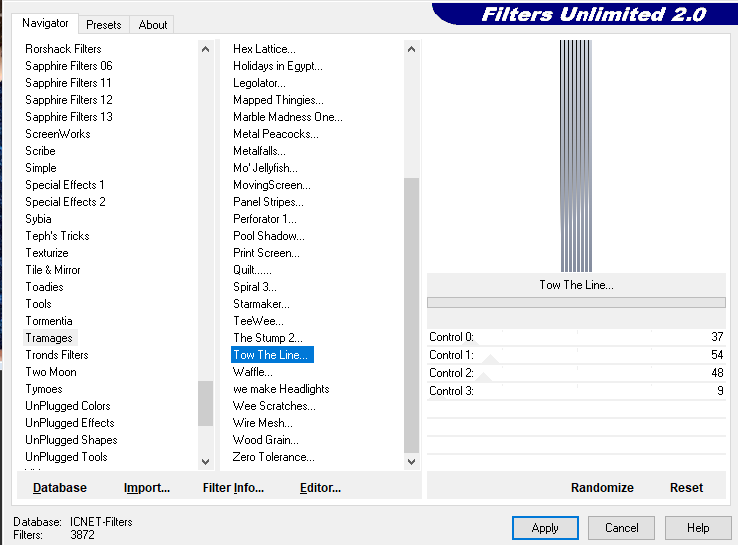
Effects / Plugins / Filters Unlimited 2.0 / Tramages / Tow the Line
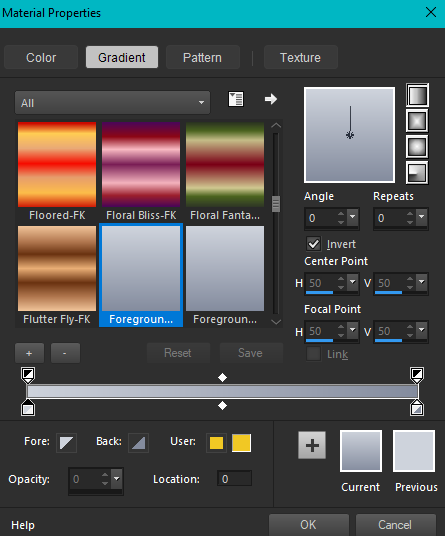
Make a Linear Gradient with Colors 1 and 2
(with these settings)
Plugins / Mehdi / Sorting Tiles
Plugins / Filters Unlimited 2.0 / & Bkg Kaleidoscope / 4QFlip UpperL
Effects / Plugins / AP [Lines] SilverLining
Effects / Plugins / Filters Unlimited 2.0 / Tramages / Tow the Line
Make a Linear Gradient with Colors 1 and 2
(with these settings)
Let us begin
1
Open a New Image / 1000 x700
Flood Fill with the Gradient
Selections / Select All
Open the Tube raz2005_Misted_WinterHolidayScene5
Edit / Copy
Layers / New Raster Layer
Edit / Paste into Selections
Selections / Select None
Layers / Properties / Blend Mode / Luminance Legacy
Layers / Merge / Merge Down
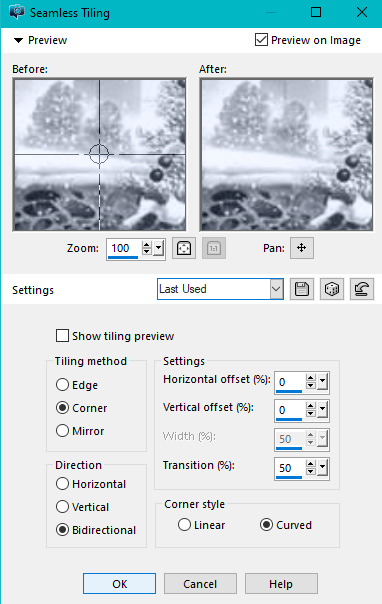
Effects / Image Effects / Seamless Tiling
(with these settings)
1
Open a New Image / 1000 x700
Flood Fill with the Gradient
Selections / Select All
Open the Tube raz2005_Misted_WinterHolidayScene5
Edit / Copy
Layers / New Raster Layer
Edit / Paste into Selections
Selections / Select None
Layers / Properties / Blend Mode / Luminance Legacy
Layers / Merge / Merge Down
Effects / Image Effects / Seamless Tiling
(with these settings)
Adjust / Blur / Gaussians Blur 30
2
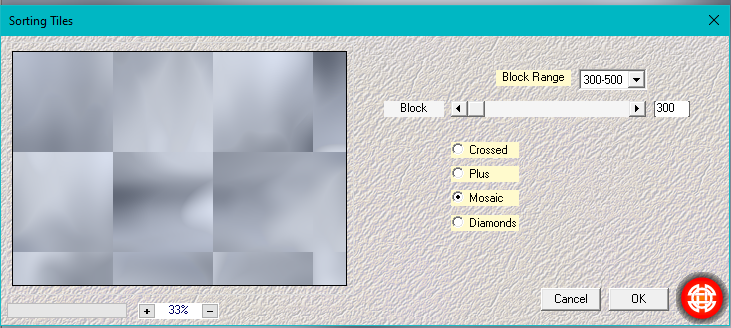
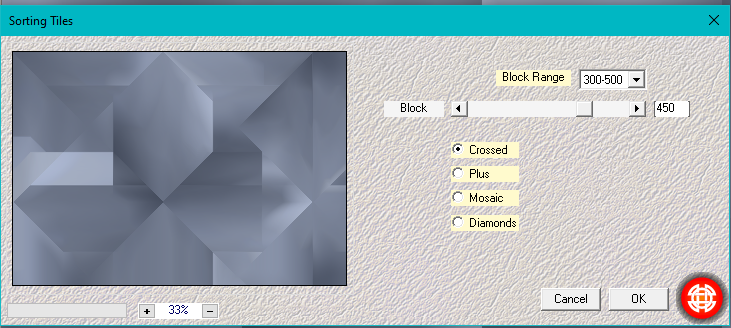
Plugins / Mehdi / Sorting Tiles
(with these settings)
2
Plugins / Mehdi / Sorting Tiles
(with these settings)
Layers / Duplicate
Image / Mirror / Mirror Vertical (Flip in previous versions)
Layers / Properties / Blend Mode / Multiply
Layers / Merge / Merge Down
Layers / Duplicate
3
Plugins / Mehdi / Sorting Tiles
(with these settings)
Image / Mirror / Mirror Vertical (Flip in previous versions)
Layers / Properties / Blend Mode / Multiply
Layers / Merge / Merge Down
Layers / Duplicate
3
Plugins / Mehdi / Sorting Tiles
(with these settings)
Effects / Edge Effects / Enhance More
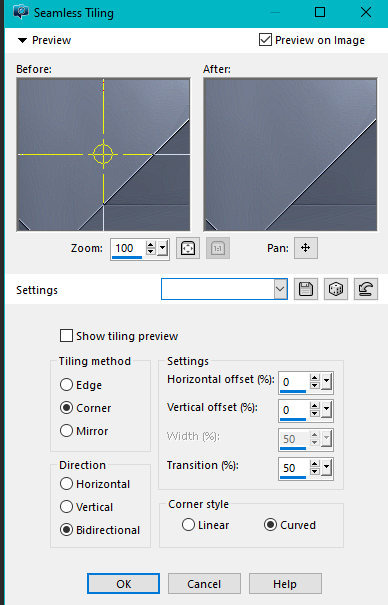
Effects / Image Effects / Seamless Tiling
(with these settings)
Effects / Image Effects / Seamless Tiling
(with these settings)
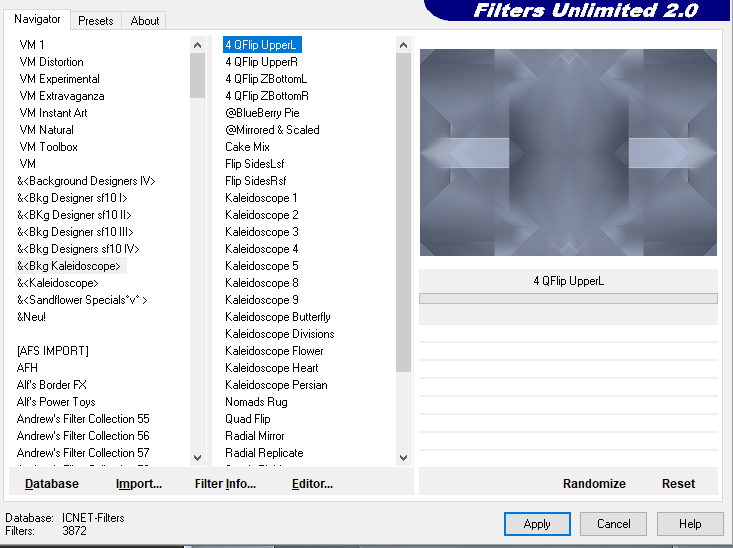
Plugins / Filters Unlimited 2.0 / & Bkg Kaleidoscope / 4QFlip UpperL
(with these settings)
(with these settings)
4
Selections / Load/Save Selection / Load Selections from Disk
(with these settings)
Locate citc 1
Selections / Load/Save Selection / Load Selections from Disk
(with these settings)
Locate citc 1

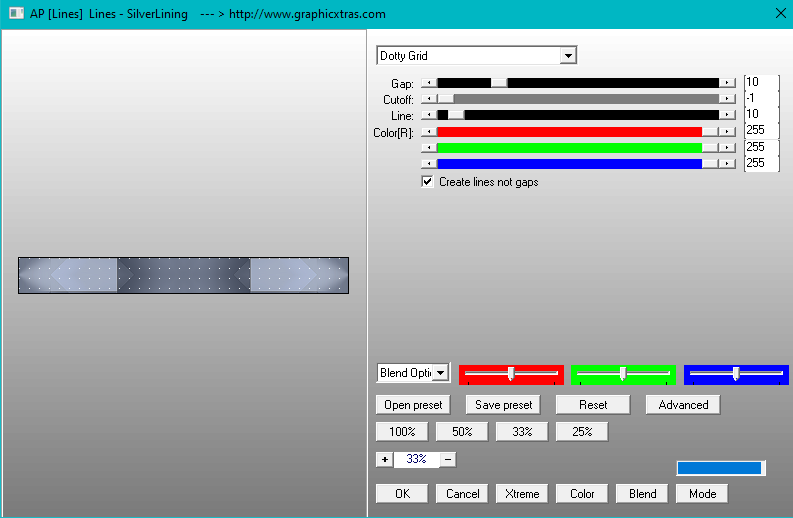
Effects / Plugins / AP [Lines] SilverLining
(with these settings)
(with these settings)
Selections / Select None
5
Layers / New Raster Layer
Selections / Load/Save Selection / Load Selections from Disk
Locate citc 2
Same settings as Step 4
Flood Fill with the Gradient
Effects / Plugins / Filters Unlimited 2.0 / Tramages / Tow the Line
(with these settings)
5
Layers / New Raster Layer
Selections / Load/Save Selection / Load Selections from Disk
Locate citc 2
Same settings as Step 4
Flood Fill with the Gradient
Effects / Plugins / Filters Unlimited 2.0 / Tramages / Tow the Line
(with these settings)
Selections / Select None
Layers / Properties / Blend Mode Soft Light
6
Layers / New Raster Layer
Flood Fill with White
Open the Mask / Narah_mask_0555
Layers / New Mask Layer from Image
(with these settings)
Layers / Properties / Blend Mode Soft Light
6
Layers / New Raster Layer
Flood Fill with White
Open the Mask / Narah_mask_0555
Layers / New Mask Layer from Image
(with these settings)

Layers / Merge / Merge Group
Pull the Image down a little
7
Layers / New Raster Layer
Selections / Load/Save Selection / Load Selections from Disk
Locate citc 3
Same settings as before with
Flood Fill with White in both Selections
Selections / Modify / Contract by 10
Press Delete on your Keyboard
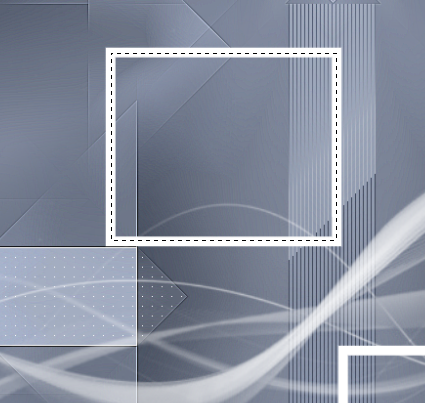
8
Activate the Selection Tool
Make a Selection like in the example below
Pull the Image down a little
7
Layers / New Raster Layer
Selections / Load/Save Selection / Load Selections from Disk
Locate citc 3
Same settings as before with
Flood Fill with White in both Selections
Selections / Modify / Contract by 10
Press Delete on your Keyboard
8
Activate the Selection Tool
Make a Selection like in the example below
Layers / New Raster Layer
Open the Tube raz2005_Misted_WinterHolidayScene5
Edit / Copy
Edit / Paste into Selection
Selections / Select None
Layers / Arrange / Move Down
Activate the Top Frame
Layers / Merge / Merge Down
#
Now repeat in the Lower Frame
from Step 8 too #
9
Effects / 3d Effects / Drop Shadow / 3 / 3 / 50 / 12 Black
Open the Tube kw deco 1
Edit / Copy
Edit / Paste as a New Layer
Place as in the Example
10
Open the Tube decor4.png
Edit / Copy
Edit / Paste as a New Layer
Image / Mirror / Mirror Horizontal (Mirror in previous versions)
Place down in the left corner as in the Example
Change the Foreground Color to White
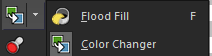
Activate the Color Changer (it is with the Flood Fill Tool in newer versions)
Open the Tube raz2005_Misted_WinterHolidayScene5
Edit / Copy
Edit / Paste into Selection
Selections / Select None
Layers / Arrange / Move Down
Activate the Top Frame
Layers / Merge / Merge Down
#
Now repeat in the Lower Frame
from Step 8 too #
9
Effects / 3d Effects / Drop Shadow / 3 / 3 / 50 / 12 Black
Open the Tube kw deco 1
Edit / Copy
Edit / Paste as a New Layer
Place as in the Example
10
Open the Tube decor4.png
Edit / Copy
Edit / Paste as a New Layer
Image / Mirror / Mirror Horizontal (Mirror in previous versions)
Place down in the left corner as in the Example
Change the Foreground Color to White
Activate the Color Changer (it is with the Flood Fill Tool in newer versions)
If you are using an older version of PSP and you do not have the Color Changer use / Adjust / Hue and Saturation / Colorize
Click on the Tube that was just added
Layers / Duplicate
Layers / Merge / Merge Down
11
Open the lady tube of your choice
Edit / Copy
Edit / Paste as a New Layer
Resize if necessary
Place as in the Example
12
Image / Add Borders 2-pixels in your Color 4
Image / Add Borders 2-pixels in your Color 2
Image / Add Borders 2-pixels in your Color 4
Image / Add Borders 10-pixels in your Color 3
Image / Add Borders 2-pixels in your Color 4
Image / Add Borders 2-pixels in your Color 2
Image / Add Borders 7-pixels in your Color 4
Image / Add Borders 35-pixels in your Color 3
Image / Add Borders 2-pixels in your Color 4
Open the Tube kw deco 2
Edit / Copy
Edit / Paste as a New Layer
Place as in the Example
Add your name or watermark
Save as jpg
Hugs Dennis
|
Dennis b tags

|
